Top 15 Woodworking Workbench Ideas & Skills You Must Know
Ever wondered about not just buying the woody things but creating them with convenience could be something you can also do? Let me tell you why did I say so. Because the stuff that is made out of wood has always been a loyal mate for all of us. So let’s make the wood our friend because we have got a lot of work to do with it. Hence here I have dropped the best 15 woodworking Workbenches ideas and skills that you can use and make your own one.
1. For Robust Garage Woodworking Workbenches
If you own a garage then having the best woodworking bench will be a great idea where you can get a designated place to woodworking and keep your tools.

What you have to do is:
- Affix the Metal Brackets to the Wall after determining the work surface height.
- Cut six support pieces and attach them to the metal brackets.
- Then cut three pieces for Secondary Base Support and attach them to perpendicular supports.
- Cut the Assemble the Top Surface and Front Piece and Assemble them.
- Attach a back panel and keep your accessories.
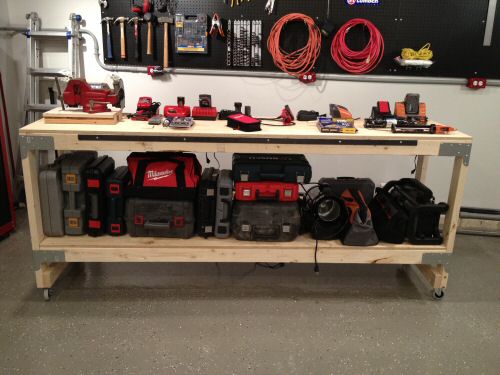
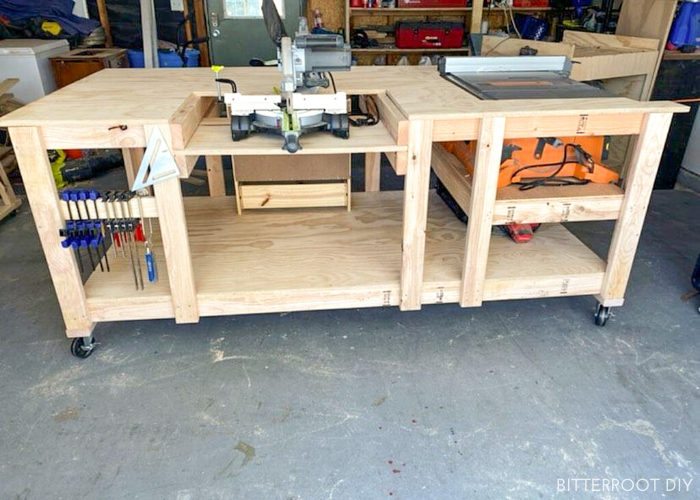
2. For Giant Woodworking Benches
This kind of workbench literally has everything that you might need. Not only does it offer a large workspace but also it features plenty of space for storage and places so that you can hang clamps, and a shop light as well. It will make your woodworking project more enjoyable.
So what you have to do is
- Assemble the supplies and make your cuts.
- After that start to put the frame together with 3-inch nails.
- Next, screw the piece down with 1-5/8 inch screws.
- Make a countersink filled with wood filler.
- Start in on the top frame via using clamps.
- Attach the legs.
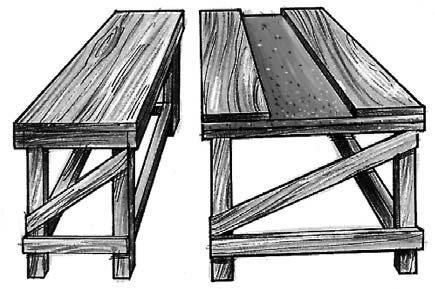
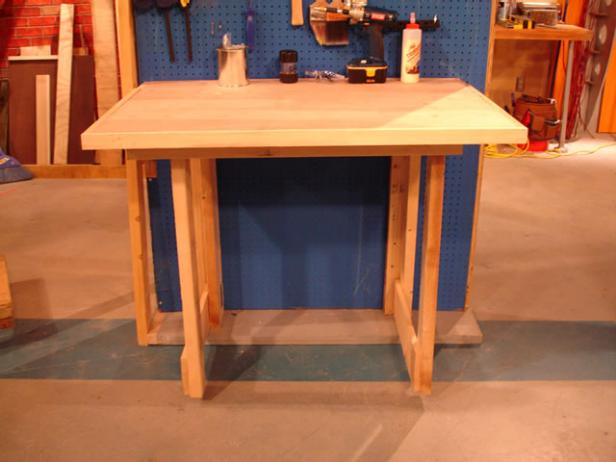
3. For Stand Alone Woodworking Benches
A stand-alone woodworking bench is also great to go in a garage or shed. It appears to have ample workspace and you can even use this Woodworking Bench for sale. Easy way to build the stand-alone bench
What you have to do is:
- Cut All of the Wood Pieces.
- Start to Assemble, and Make the Top First.
- Assemble the Bottom Support.
- Cut the top and bottom pieces to size and attach the pieces with1 ¼ inch wood screws.
- Stain and Finish the Workbench.
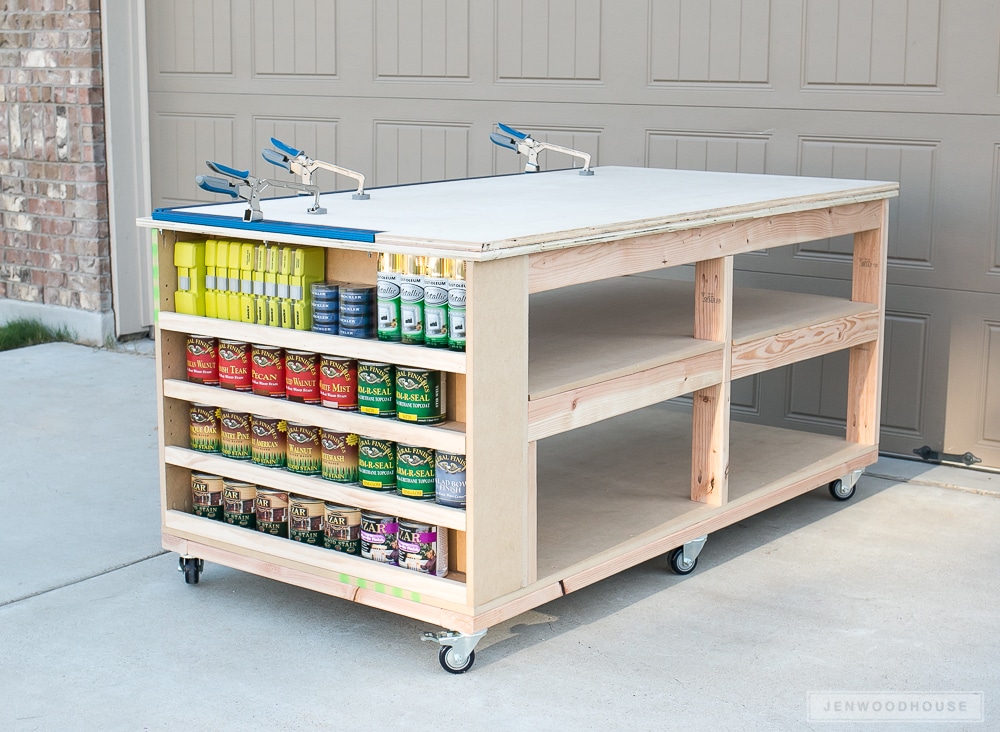
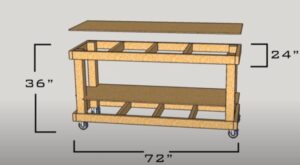
4. The 4×8 Woodworking Benches
This is another best woodworking bench to have. You will have plenty of workspaces. And the plans are easy to read as well. But you need an extra shelf while building this workbench.
What you have to do is
- At first, build a few oversized letters with the pieces.
- Then build the carcass with 2.5-inch screws and wood glue.
- Next, notch out the spaces in the plywood so the legs fit perfectly.
- Then drop the plywood into place and secure it with 1 ¼ inch screws.
- Attach the 3-inch locking swivel casters to the bottom.
- Then build the second shelf frame.
- Then build the bottom shelf.
- Afterward, move to the top.
- Then lay the woodworking benchtop without using any glue.
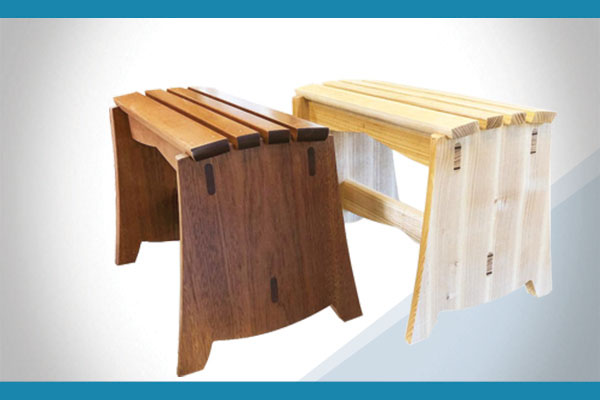
5. For Timber Woodworking Benches
This is another great bench that you can kick off your woodworking projects with. It is not only an easy woodworking bench DIY but also useful enough to make your work easy.
What you have to do is:
- Locate Wood and start to Cut
- Then build the legs.
- Repeat the steps for planks as well on the second log.
- Then assemble the woodworking benchtop to add to the legs.
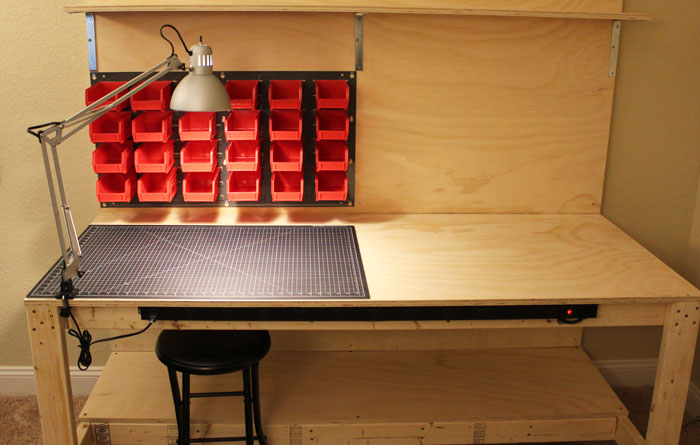
7. Garage Workbench With Storage
You will definitely need some workbench storage as well as your need for woodworking bench plans. And if you build this workbench for the garage then it becomes more useful.
What you have to do is
- Collect gears for your garage workbench
- Gather the main component.
- Build the top and bottom.
- Attach the sides.
- Add a shelf and drawer divider by fastening it.
- Install the drawer guides and place drawer fronts accurately.
- Attach the back the construct the drawers.
- Install the folding top.
- Cut the support arms and assemble them via drilling the pinhole.
- Affix the brace board and screen mold.
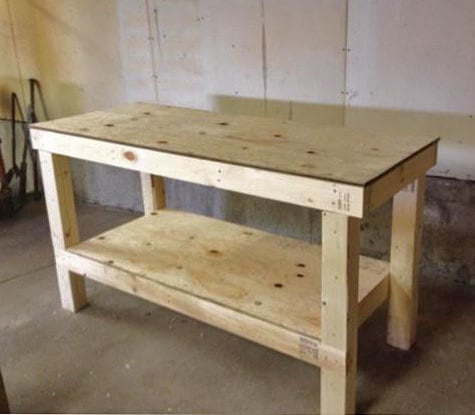
7. For Heavy Duty Woodworking Benches
You can even make a workbench that will cost you little to not only make it an inexpensive workbench to have but also a heavy-duty one.
All you have to do is
- Assemble the tools and materials.
- Build the Frame.
- You need frame having 2 rectangles which will be 76 inches by 32 inches and 4 legs which will be 32 inches long made from 2X4 plywood.
- Cut the pieces of legs and attach the legs together to make an L shaped frame.
- Repeat it 3 more times.
- Attach the Top to the Frame.
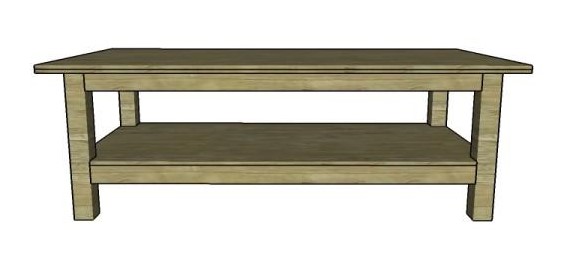
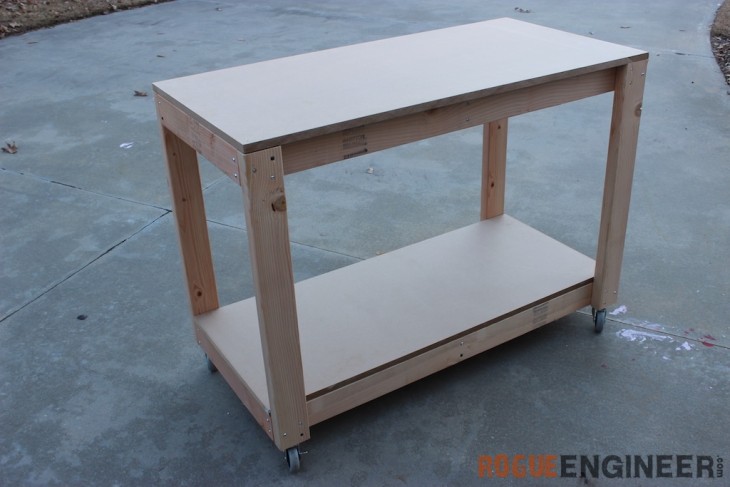
8. For The Single Shelf Woodworking Benches
This workbench has a very simple design that attracts you the most. It consists of a single shelf that gets to take lesser time to build the whole workbench.
What you have to do is
- Get all the boards cut.
- layout the shelves of top and bottom.
- Drill two holes at each end of the 4 30-inch cross boards.
- Attach the boards to the 84-inch boards for building a rectangle with two support pieces.
- Your top platform is done.
- Then drill two holes at each end of the 74-inch boards and two 20-inch boards.
- Next, attach them to four 30-inch 4×4 legs for creating the base.
- flip the base over after assembling it.
- Position it inside the frame you created for the top.
- Attach the top to the base with screws in the corner.
- Drill a hole in the middle of each 4×4 for casters.
- Flip the bench over and insert the casters.
- Put the 30-inch by 84-inch piece of plywood on the frame via screwing it in.
- Place the 27-inch by 81-inch plywood with 3.5-inch by 3.5-inch cutouts at the bottom frame.
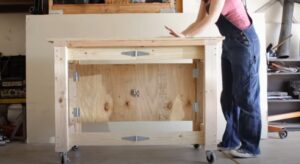
9. The Beginner Woodworking Benches

This kind of workbench looks elegant but it can be broken down and built easily by a Beginner at carpentry. The workbench consists of a large storage shelf underneath the workbench.
What you have to do is
- Cut parts of the plywood perfectly straight.
- Frame the drawer compartment.
- Insert the top and bottom of the drawer compartment.
- Screw on the legs.
- Add the shelf and attach the legs and shelf.
- Cover the plywood ends with screen mold.
- Build the drawers.
- Double-check the size of the drawer openings.
10. Easy Portable Workbench
A portable workbench might look difficult to build but it is rather easy to make one. If you are looking for a portable workbench, you can build one and it won’t take much time either.
What you have to do is
- Assemble 2 boxes using 2.5-inch wood screws.
- Assemble frame with 3 screws at each connection.
- Attach 3-inch casters using 1 ¼ washer head screws.
- Nail down top and shelf using 2-inch nails.
11. For Flip Top Workbench
A flip-top woodwork bench lets you store whatever large tool you need below. you can just flip it over and use it. So you can Build a simple Flip-top table

What you Need to do is:
- Assemble sides.
- Cut four plywood of 2×4 to 29 inches and four other plywood to 17 inches.
- Attach using 2.5-inch pocket hole screws.
- Drill pocket holes at the ends of the 17-inch plywood.
- Glue two of the 17-inch pieces.
- Fasten two of the 29-inch pieces.
- Cut side rails and bottom pieces.
- Cut two pieces of 2 by 4 to 14-inch.
- Cut four pieces of 2 by 4 to 34-inch.
- Assemble the bottom by repeating the same process.
- Clamp Side Rails.
- Position all pieces.
- Put glue only to the side rails ends.
- Fasten and attach only the upper 2.5-inch screw of the side rails.
- Put glue on the sides of the bottom and replace it.
- Drill countersink holes with 3-inch screws in the side rails and sides.
- Flip over and fasten bottom long side pieces with 2.5-inch screws to the sides.
- Assemble Table Frame.
- Cut Table Top and Bottom.
- Then go for building Long sided and short-sided table Interior Frame.
- Attach Top and Interior Center Rails.
- Connect Table to Sides.
- Attach Barrel Bolts.
- Install Plywood Workbench.
12. The Ultimate Mobile Workbench
This is another great portable workbench you can have for your project. It also is easy to build and does not take much cost in making it.
What you have to do is
- Construct Frame.
- Cut Sides and Bottom Panels.
- Drill Mounting Holes and fasten Hardware
- Build and Install Drawers.
- Construct Doors and Interior Shelves
- Build Extendable Side-Shelf
- Install Casters and Table Top
- And some final touches then are done.
13. For A Budget Workbench
Every woodworker might not want to look for a workbench that will cost him a load. For this, one can DIY a workbench with a lesser budget that will not only build strongly but perfectly just like the workers want.
What you have to do is
- Build the base first.
- Fasten the stretchers and legs together
- Drill and bolt the base together.
- Assemble the top via gluing and screwing the top
- Then attach the legs.
14. For A Fold-Down Workbench
You might not own a larger shop space and as space is small having a good workbench becomes a concern. But Don’t worry you can make a fold-down workbench for yourself to get rid of the concern.
What you have to do is
- Make Frames and Support.
- Add the Frames to the Cleats.
- Make a Workbench top.
- Cut a groove deep and wide measuring 6 inches for the long sides of the top.
- Attach the Pieces, and Finish the Unit.
15. Another Folding Workbench
This is another workbench that you can fold if you have little space in your shop space. Building it is as easy as building Legos if you happen to be a woodworker.
What you have to do is
- Cut the pieces from two sheets of plywood.
- Glue and pin the shelf supports two sides.
- Again glue and pin the bottom and top pieces to the sides.
- Flip the bench on top of the casters.
- glue and pin the hardwood edging to edges of the piece.
- Attach the pipe flanges and then close up of the center punch.
- Insert the cam locks.
- Open the bench and thread on the legs.
- Then you ‘re good to go.
Related Article:
- 45 Top Woodworking Tools Using Guide [Beginner to Expert]
- Best Mobile Base For Table Saw And Bandsaw: Top Seven Reviews In 2022
Table of Contents
![How To Make a Tapered Coffee Table? [Plans Included]](https://woodworkingarena.com/wp-content/uploads/2021/06/Tapered-Coffee-Table-1.jpg)
![15+ Free Real Life Workbench Plan Projects and DIY Design-2024 [Workout Plan]](https://woodworkingarena.com/wp-content/uploads/2018/02/Workbench-Plan-768x399.jpg)