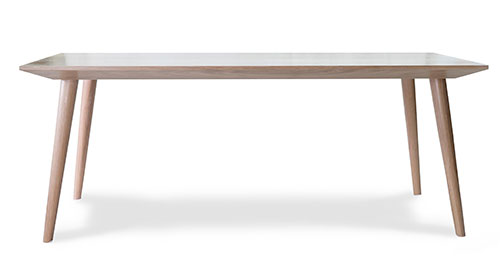
How To Make a Tapered Coffee Table? [Plans Included]
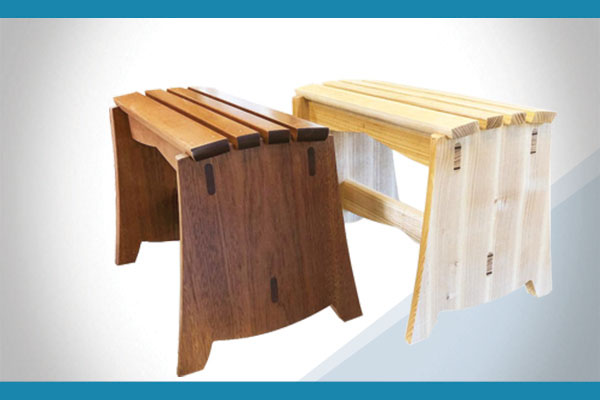
The tapered coffee table is a perfect accessory for the living room and a great project for intermediate furniture makers. A significant chamfered edge gives this table a sleek appearance and it is held up with modern, turned, and tapered legs.
Material List
Necessary materials and tools for making a tapered coffee table are given below:
Materials
- 8/4 (2″) lumber
- 14.5 board feet for the top
- 2 bf for the legs
- A half sheet of ¾” plywood
- Glue
- Sandpaper
- Wood finish
Tools
- Table saw or miter saw
- A band saw or jigsaw
- Jointer
- Planer
- Calipers
- Drill press
- Angle finder
- Angle gauge
- 1″ Forstner bit
- Assorted small tools
The cutting dimensions of our table are given in the below table.
| Top | Legs | |
| Quantity | 1 | 4 |
| Lengths | 48” | ¼”-18” |
| Width | 24” | ¾”-1” |
| Thickness | ½”-1” | ¾”-1” |
Lumber
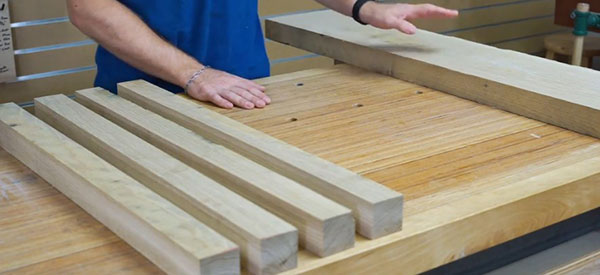
For making this project, we need 8/4 (2″) rough sawn or pre-surfaced lumbers and then we will select parts of lumbers and mark out the top and legs of the table with a chalk or lumber crayon.
The legs need to be straight grain as they are the main structural component of the table. If you are using rough sawn lumber, you will want to use a jigsaw or band saw to cut them to their rough dimensions. I cut my top boards to about 50″ and cut the legs to about 28″. I then ripped the legs at 2″ on the band saw. For the legs’ length, rough cut them to 25″ or longer as you will need extra on the legs for turning. You are now ready to move on to milling.
Milling
In the milling process, I always recommend starting with the faces. The process will be the same for the legs and the top, except we won’t cut the top to length until after the glue. Take your lumber to the jointer; draw a few lines with your pencil perpendicular across the board so you’ll be able to observe where the highs and lows are on your board.
Begin jointing the face of your board and continue until it is flat and the pencil marks are gone. Move your board over the jointer in a smooth continuous motion and use push blocks for safety.
Take your board with the one flat face and run it through the planer with the clean side down to the bed until the opposing side is flat and parallel. Now flip the boards over end to end and mill it down to its final thickness, 1-½” for the top boards and 1-¾” for the legs.
Using a square to check the jointer fence whether it forms a perfect 90° angle with the bed. If it is, then joint the edge and check its squareness with a square.
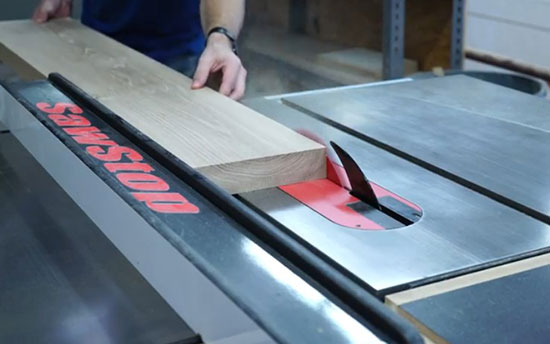
Then start ripping the top boards to width with a table saw. Set your fence to cut off just enough width to clean up the edge, so they stay as wide as possible. Set top boards to the side. They are done for now since we will cross cut them to length after they are glued up. Let’s crosscut our legs to size now, and 25″ to 28″ length should be acceptable. We are done with milling and ready to move on to gluing up the tabletop.
Gluing Up the Top
The most important thing to remember when gluing up a large top like this is to have everything ready before applying glue. To glue up the top:
- Get your clamps set up with half of them laid out on the bench. The other half will go on top.
- Lift two boards on edge and begin squeezing plenty of glue out onto the board and use your finger to spread out the glue.
- Lay the board back down and push them together.
- Start applying clamp pressure to your boards in the center and work your way out one side at a time.
- Keep an eye on the joints to ensure that the boards are staying in line with each other.
Please clean up the glue with water and a rag while it is wet. You can scrape dry glue, but it would result in a significant tear out. Usually, I use a card scraper to clean up my glue lines. After removing the glue, you can take a hand plane to level the table top out to flatten the top enough to make sanding easy work.
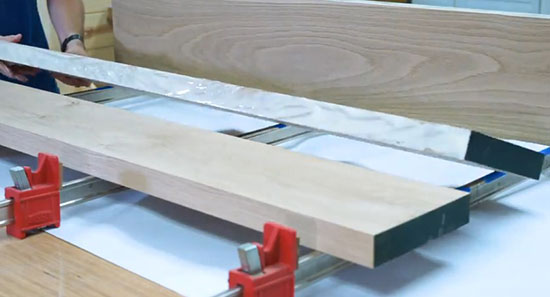
You will need a track saw or a circular saw with a fence to crosscut your tabletop. Measure how far away your circular saw blade is in front of the plate edge that will ride along the fence. Measure out from there and draw a perpendicular line across the table. Line up your fence to that line and clamp it down with clamps. Place your saw up against the fence. Then you are ready to start cutting. Repeat the process on the other end to get a 48″ long tabletop. If you make a mistake while crosscutting, you can make your table shorter.
Mortises

You will need a drill press with a decent size bed to clamp to your top down for the mortising process. Make sure your drill press is bolted down so there is no chance it can tip over.
Start by checking that your drill press is running true and is perfectly perpendicular to the table bed. Grab a 1″ Forstner bit and secure it in the chuck. Find the center point below the drill bit and draw an “X.” Carry that point, in the form of a line, across the table.
Using a combination square, align the boards on the drill press table to form a 90° corner centered along the line you drew across the table. The corner of these two boards should be slightly more than 6″ from the “X” you outlined previously. Make sure the boards are securely clamped down to the table.
Take your angle finder and zero it out on the drill press table. Tilt the bed down until you reach 11°. Lastly, set your depth stop to prevent the drill bit from going all the way through the top.
Lift the tabletop onto the drill press and double check that the bottom of the table is facing upward. Move the corner of the table into the corner of the jig and clamp down the top. Turn on your drill press and begin to drill slowly.
Angles Shoulders
Making the angled tenon shoulders will be one of the more difficult things you will do in this project. Draw a straight perpendicular line across your leg 4″ from the end. That end is now the top and is where the tenon will be. Set your angle gauge to 11° or 79° depending on how you zero it out. Keep this angle gauge set to 11° for the duration of the project. From the first line, you drew an angled line with your angle gauge downward toward the bottom of the leg. Do this again on the opposing side. Draw one more straight line to connect the two angled ones.
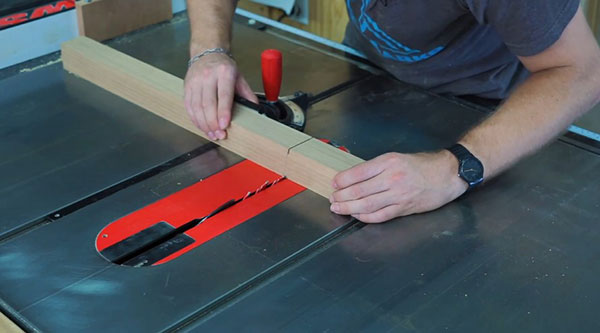
The wood and gauge will be 90° perpendicular to the blade, but the blade will be tilted. And the miter gauge should be in the left slot. Next, set the blade to 11° with your angle finder and set the height of the blade to ⅜”. Check that you are about to cut on the correct side of your line. Put an “X” on the right side of the line closest to the top of the leg. You are now ready to cut your first shoulder cut. Make that cut on all four legs.
We will now cut the opposite side of the previous cut. Move the fence away and transfer the miter gauge over to the right slot. Don’t change the blade angle for this operation. Line up your mark to the blade and clamp the wood to the miter gauge. Set your fence with the block up again and cut all four legs.
Move your fence away to have more room for the setup, and move your miter gauge back to the left slot. Set your miter gauge to 11° to the blade and lower the blade back down again to ⅜”. Clamp the leg, set the fence and cut all four legs.
Move your miter gauge over to the right slot and reset it to 11° in the opposite direction. Lower the blade to ⅜” and align the leg, clamp, set the fence and cut.
Turning the Tenons and Legs
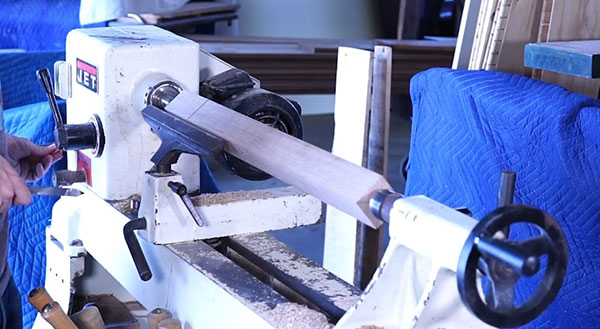
For turning, measure down the leg and make a mark at 17-⅜”. That will be the bottom of your leg. Make another mark at 8-11/16″, which will be the midpoint of your leg. Draw a line through those marks using a square and carry them around all four sides of your leg. Use the first leg to transfer patterns to the other legs. Find the center point on the end grain of the top and bottom of all legs by drawing an “X” from corner to corner and use an awl to mark that intersection point. Set your calipers to 1″ and 1 ⅜” and cut them down. The uppermost part of the leg should be kept as thick as possible.
For cutting legs, unplug the miter saw and use your angle finder to tilt the blade to 11°. Cut the tenon to be about 1-¼” long and cut the foot off 17″ down from the shoulder. You can cut legs as long or as short as you like.
Chamfering the Top
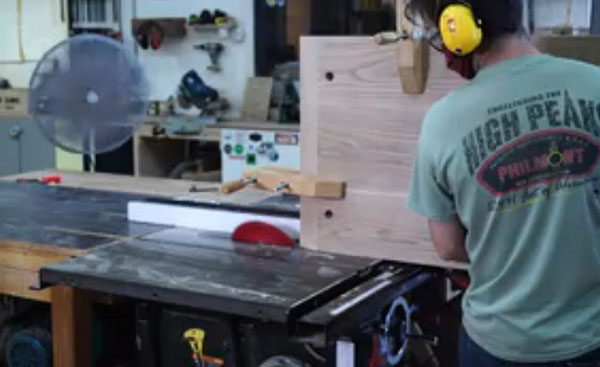
The top is quite large and heavy, and so you will need to build a table saw jig to safely cut the sharp angled chamfer. You will need about half a sheet of ¾” plywood to construct this jig, which will need to be 4″ long and 2″ tall.
Make sure your saw is turned off before setting up and draw a line on the table’s edge around one corner that is ½” from the top. Place your jig over the fence on the table saw and move it until it is a few inches from the blade. Lift your table to the jig and clamp it down, starting with the ends. Move the fence and table top over until the blade lines up with the ½” mark.
Cut both ends first, then the sides. End grain is more likely to blow out and can easily be cut off when you do the sides last. It is essential that the table is always flat on the table saw a bed, so you do not end up with a curved chamfer.
We will do final sanding after assembly, but it will be much easier to clean up the bottom and the chamfer without legs. You use a hand plane to take out any central table saw blade marks.
Finishing Touches and Glue-up
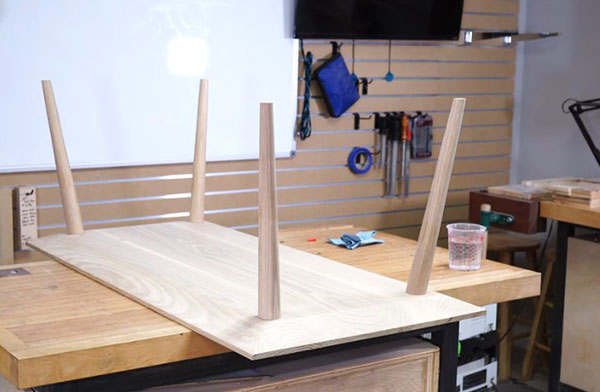
Before gluing, begin test fitting each leg. The shoulders are seating all the down to the table bottom, and tenons are not hitting the bottom of the mortises.
For the glue up you will need a few things to help you along the way. A scrap board to squeeze glue onto, a brush to spread the glue, a cup of water, and some paper towels or rags for clean up.
Put glue on both the mortise and tenon and slowly put the tenon down into the mortise. Insert all four legs so that they are facing 45° pointing right at the corner. Place your board back on top of all the legs and begin clamping. Tighten it enough to hold the clamp on the board but do not tighten them too much, or your legs will splay and getting stuck that way.
Clean off any squeeze out with a wet rag. Give your table 24 hours to dry before removing the clamps. You may need to soften some of the edges with a block page for sandpaper.
Before moving on to finish, blow off all the dust and clean the table thoroughly.
Thank you so much for taking part in the Tapered Coffee Table project.
Table of Contents
![15+ Free Real Life Workbench Plan Projects and DIY Design-2024 [Workout Plan]](https://woodworkingarena.com/wp-content/uploads/2018/02/Workbench-Plan-768x399.jpg)