45 Top Woodworking Tools Using Guide [Beginner to Expert]
In this busy world, people must do something for a living. Modern world demands creativity in your work. Creativity makes your work life enjoyable. When it comes to woodworking it is always enjoyable because of its creative nature.
Any types of well-designed handcrafted furniture are beautiful, but creating an antique quality can give you immense pleasure. To perform a task easily choosing the right tools are important and if you are thinking about woodworking there are so many specialized tools to make your task easier than ever. Here is a complete list of the useful tools every woodworker must have to perform their task smoothly.
Types of Woodworking Tools
So, as you are here I am assuming that you have some plan for woodworking. Whether you are a craftsman or professional woodwork, first of all, you must know about the types of woodworking tools that exist in the market. As the popularity and necessity of woodworking are increasing day by day different types of tools are invented regularly. But you can put all of the woodworking tools into 4 major types.
- Hand tools- The woodworking tool that can be used by using your hand is called hand tools. There are so many common hand tools that will increase the productivity of your workshop.
- Power tools- The woodworking tool that is power operated is called power tools. Power tools are something that you’ll need to make your woodworking work perfect.
- Furniture and storage system- Furniture type tools and storage systems are something that is going to help you to organize your favorite and important woodworking tools.
- Control items- There are some items that are not actually woodworking tools, but so much significant for the success of your woodworking project.
Hand Tools You Must Have
If you are new in woodworking you should start with some effective hand tools. Hand tools are popular among the woodworkers for their simplicity. You will definitely love to bring some art to your woodworking. Let’s have a journey with me to know everything you should know about woodworking hand tools that you must own now.
#1: Hand Saw
Woodworking is an artful work. You most probably don’t want to use power tools in every task, you may want to feel your work. The most perfect solution for you is a well-designed hand saw.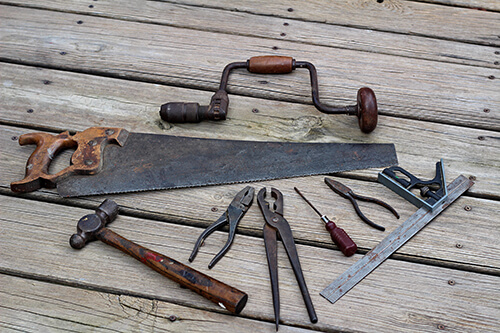
Handsaws usually come with a wooden handle and are long in shape. This type of hand saw is usually called a panel saw which comes in two tooth configurations: “RIP” and “Crosscut”. To do your woodworking task perfectly you will need both.
There are some variety of hand saws that are useful for a specialized task. Although many woodworkers need a “coping saw” in their daily work, there are some backsaws that will be extremely useful for you.
You can consider a “dovetail saw” which comes with fine rip teeth and used for cutting joinery along the grain. If you want to cut across the grain you will need a “carcass saw”. Sometimes you need to perform a deeper cut, in that case, a larger tenon saw will make your day without a doubt.
Video: how to use a hand saw.
Who invented hand saw?
Answer: Hand saw has been used from ancient times. Most probably, in 1500 B.C. metal hand saws were discovered in Ancient Egypt and in that time it was also used in ancient Mesopotamia. In southern France, hand saw made from flints were discovered. Moreover, stone made hand saws were discovered in Europe. Check out Hand tool history
Why does a saw have teeth?
Answer: Teeth is the major element of a hand saw. Literally, a hand saw is nothing, but a piece of useless metal without teeth. The number of teeth determines the function and ability of a hand saw.
To perform a smoother cut, hand saw must have more teeth, on the other hand, fewer teeth help the blade to remove more material. Usually, a crosscut blade has more teeth and used to perform smoother cuts, whereas rip blades contain fewer teeth to cut with the grain that removes a lot of material.
#2: Claw Hammer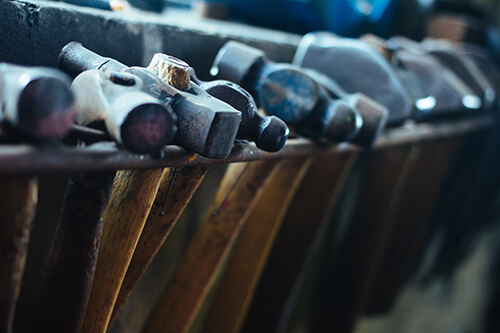
If you’re thinking about woodworking, perhaps the most basic tool you want to have is a claw hammer. A forged steel head with a hole for fixing a handle is the main element of a claw hammer. One end is made to fit the hole in the hammerhead, then a steel wedge is driven into the wood which forces it to expand and secure the hammerhead to the handle.
The hammerhead and the handle should be well balanced. Because a poorly balanced claw hammer will not be 100% functional and may twist in your hand. From household works to construction works you just can’t imagine woodworking without a claw hammer.
What is the classification of claw hammers?
Answer: There are several types of claw hammers available in the market. They are as follows.
- Section 1.
- Curved Claw Hammer.
- Straight Claw Hammer.
- Framing Hammer.
Questions: What does a hammer symbolize?
Answer: The hammer is not only a tool; it represents might. The hammer is the thought while the anvil is the brain. It is used often by the gods; it is Thor’s most valued (but often lost) possession. They use it for destruction, protection, and fertilization, but it also symbolizes immortality. In the case of woodworking, the hammer will definitely make your day.
#3: Tape Measure
In many types of work, measurement is important. Right? And when it comes to woodworking measurement 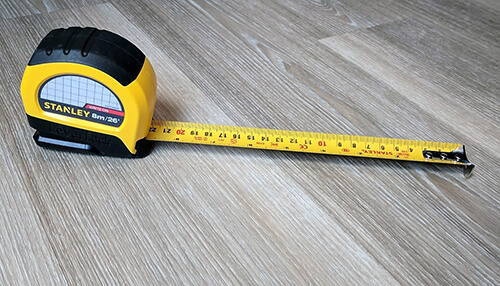 becomes more important, because of every inch matters here. So, every woodworker needs a good and accurate tape measure. You should consider the retractable tape measure which is at least 25 feet long.
The length of the tape measure is important as a longer tape measure will create problems when you rollback. The hook of the tape measure should be attached firmly with the tape scale.
Since the measurement is important in woodworking you should check the flexibility and length of a tape measure. A perfect tape measure will give accurate measurement which is so much important in woodworking.
How can you read a tape measure?
Answer: You can read a tape measure easily by following these easy steps.
- First of all, read the markings. You’ll find it easily in your tape measure. Look for the biggest and bold number in your tape. Generally, the biggest mark is an inch in a maximum tape measure.
- Attach the hook on one side of the object that you are measuring and pull the tape to the other side of the object.
- Read the markings carefully.
How long is a tape measure?
Answer: Tape measures have different sizes based on the requirement of the user. In most cases, common tape measures are 12 feet, 25 feet or 100 feet in length. The 12-foot tape measure is so much popular to mass consumers. On the other hand, the 25-foot length is called a builder’s tape. You can also have 100 feet long tape measures in the market.
#4: The Caliper
The next tool I am going to discuss is a caliper. Basically, it’s a measurement tool that used to measure the distance between two opposite sides of an object. 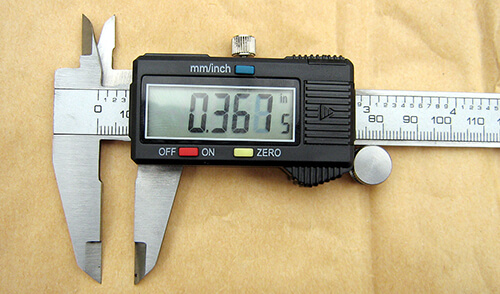 To perfectly fine-tune your woodworking project a set of the caliper is a must. Now the blessings of modern technology will give you the opportunity to use digital caliper which will give you an accurate measurement.
You can measure both outside and inside of an object with a caliper. In a general case, it has a double “F” appearance to measure both outside and inside of openings. Using the calipers for most woodworking tasks is simple and somewhat straightforward, but the most challenging part is learning to think in measurement terms based on the decimal system.
Use your caliper carefully to get the accurate value. After taking out the caliper, check it out for removing any dirt from different parts of these tools. Don’t forget to check the dial to see if it is calibrated. If you use the digital caliper you will get a new level of accuracy.
What is the inside caliper?
Answer: You’ll need a caliper to measure the distance between two points. Inside caliper is basically a tool that can measure inside dimensions such as the size of a cavity or a hole.
How accurate is digital caliper?
Answer: Digital calipers can be as accurate as 0.001 inches over 6 inches if correctly used. But the accuracy is likely to diminish over longer spans. Generally, digital calipers are capable of measuring 40 inches.
#5: Sliding Bevel
Sometimes in woodworking, you have to measure some angles. Here is an awesome tool for measuring a bunch of 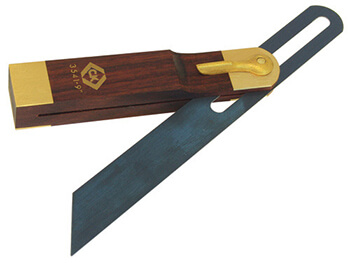 angles, which is a sliding bevel or T-Bevel. A sliding bevel, also known as a bevel gauge or false square is an adjustable gauge for setting and transferring angles which is so much useful in woodworking for making the task handier and easier.
You’ll find the sliding level is made of wood and is connected to a steel blade. By using a functional wing nut, the blade can be locked at any angle and measuring angle becomes easier.
How do you bisect an angle with a sliding bevel?
Answer: It can be done by following these easy steps. First of all, set a bevel to the angle you want to bisect. Come on! this is the first thing to do. Then, you have to grab a scrap piece of timber, just make sure that it has a perfectly straight edge.
The next step is keeping the handle of the bevel up to the bottom edge, then carefully mark a pencil line on both sides of the bevels. Finally, you got to bisect the marked angle carefully.
#6: Nail Set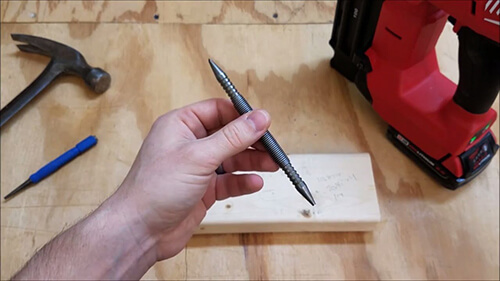
Every woodworker must own a nail set of several sizes. The nail set easily drives a nail into any wood or wooden surface without using a hammer. You just need to pull the spring on the nail set to drive the nail in the wood.
With a little bit of effort, you can easily drive the nail into the wooden surface. Literally, woodworking is kind of impossible without using a nail set.
What are the different sizes of finishing nails?
Finishing nails are made of steel, and they come in different sizes and thicknesses. Gauge size ranges from 16 to 10, the smaller the gauge size, the stronger the nail. Finishing nails vary in length from 1 inch to 4 inches.
The size of finish nails is also measured by “penny” units. The letter “d” is used to determine the length. In this method, a 2d finishing nail is 1 inch long, and a 6d nail is 2 inches long.
#7: Layout Square
Another widely used tool in woodworking is a layout square which is also known as speed square. Basically, it’s a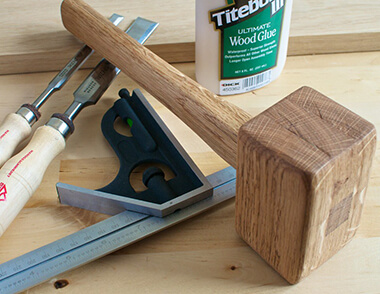 triangular-shaped measuring tool available in 6 inch and 12-inch models. But the most widely used layout square is the 6-inch model. Due to its function ability, every woodworker will want a layout square in his toolbox.
The layout square has multiple functions. It can be used for scribing square90-degree cutting lines on woodworking stock. If you need to make a square cut the layout square would be extremely helpful. This tool can be used in woodworking for making complex tasks simple.
You can even use it as a cutting guide. To do this you just need to hold the square firmly against the wood and then run the foot of the circular saw against it while cutting, which will definitely make your task easier.
What is a layout Square?
Answer: A layout square or speed square is a widely used measuring tool in woodworking. Basically, it’s triangular in shape and has a wide variety of uses in carpentry and woodworking.
#8: Block Plane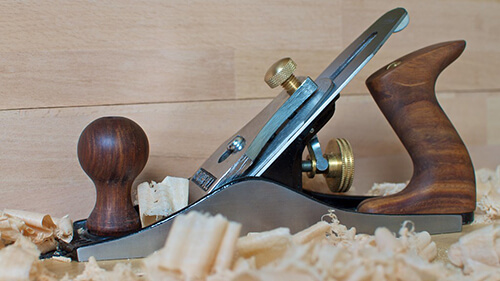
A block plane is an amazing woodworking hand tool that has the blade bedded at a lower angle than other planes, with the bevel up. It has wide use in cutting end grain and the most interesting part is it can be easily used by only one hand.
It is widely used in woodworking as it has versatile function ability. To flatten a piece of wood, or add a curve to it you can use a block plane. You can even square your work by using this amazing tool. Moreover, you can use a block plane for pairing and graining.
It has a blade set at a shallow bed angle which allows the blade to slice through end grain more efficiently. Basically, the plane is frequently held at an angle nearly 45 degrees to the direction of travel that allows the block plane to perform its task smoothly. In woodworking, you would definitely love this amazing woodworking tools.
What is the difference between a jack plane and a block plane?
There is some difference between the jack plane and a block plane based on their function. Usually, bench plans are good at cutting with the grain while block planes are widely used for cutting end grain. The plane size, whether the bevel faces up or down and shapes also affects the function.
#9: Utility Knife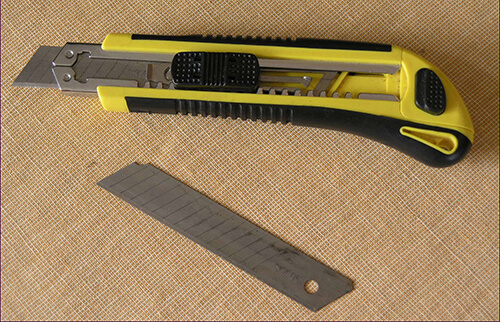
Ever imagine a situation that you are doing woodwork and you don’t have a utility knife set? Yes, you are definitely right. This small but effective toolset is widely used in woodworking. From kitchen work to woodworking a properly sized utility knife will make your day.
A utility knife is a knife that has a cutting edge and is used for several utility purposes. You want to use the utility knife when cleaning out mortise joints or scribing wood and in many other uses. Just one thing to remember, you should have the set of utility knife that has knives of a variety of sizes. Check Also: Top 6 Best Draw Knife- Reviews & Buying Guide
What is the safest utility knife?
Answer: Utility knife has so many functions in real life, but it comes with inherent danger. The safest utility knife should be the utility knife with an auto-retracting utility blade.
There is also a type of utility knife named the wiss auto-retracting utility knife that has a mechanism which that retracts the blade automatically the moment it loses contact with the material being cut, which indeed proves a great functionality of this kind of knife.
How long is a utility knife?
Answer: The length of the utility knife varies with its functionality. In most cases, the standard utility knife is 2-8 inches long. You can cut off a maximum of 1 inch with it.
There are some extra long utility knife blades measure a big 3-3/4 inch long and can give you an exposed cutting area of at least 2-1/4 inch. Infect, utility knives come in so many varieties in real life just because of its functionality.
#10: The Moisture Meter
The level of moisture is one of the important parameters in woodworking. Moisture is the percentage of water in a 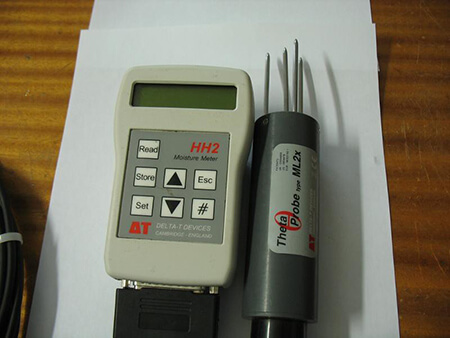 given substance. Moisture level determines if the material is ready for use. You must own a moisture meter for measuring the level of moisture in a particular substance.
As a woodworker, you would definitely love to make a quality wooden piece, whereas quality is also dependent on the moisture level in wood. Because whether the wood is dry or wet matters a lot in woodworking.
As high moisture content for a period of time may progressively degrade a material measuring the moisture level is highly important. So, you should choose the right one. There are basically two types of a wood moisture meter, one with pins and another is without a pin.
Try to use the moisture meter that comes without using the pin as they will not leave any mark on the wood surface, just make sure that you are using the meter that uses modern technology.
How can you read a moisture meter?
Answer: When we are talking about moisture meters especially about pin-type moisture meters, you must keep it in mind that there are basically two pins in the instrument, which are used to penetrate into the test surface at the desired depth. The moisture can be read by measuring the electrical resistance between the tips of two pins.
What is the unit of moisture?
Answer: Usually, the pressure is measured in millibars (MB) and inches of Mercury (inHg). For example, 1 MB = 0.02953 inch Hg. On the other hand, relative humidity which is expressed as a percent measures water vapor relative to the temperature of the air.
#11: The Clamp
The next woodworking tool I would like to mention is the clamp. In most the cases, your success in any 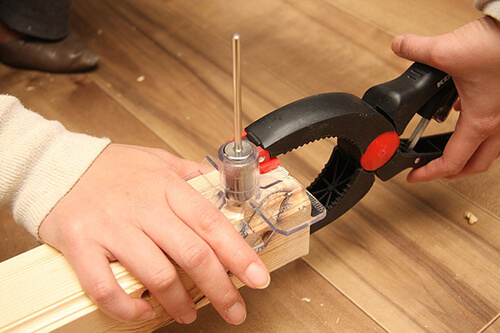 woodworking project more or less depends on the right use of clamps. You’ll definitely need clamps for joints, especially for 45 and 90-degree joints.
You also want to use pipe clamps to reach for long stretches. To make a clamp of your desired size you must insert your own pipe onto the newly purchased pipe clamp. There are standard clamps like C clamp, F clamp, but the good news is the K camp is also available to use now. Moreover, deep-throated bar clamps and C clamps to reach out the really long way and make the task easier. Another type of clamp is quick to grip clamps that are available in 12’’ or more which is widely used in woodworking.
To hold laminate trim onto the edge of a counter or tabletop you will definitely want to use an edge clamp. There is also a wonderful clamp that has the ability to wrap around any shape and to pull the joints together. To hold a piece steady you can use a spring clamp. You must choose the right clamp for your specific woodworking task so that you can easily perform your woodwork.
Video: Learn More About Clamp Tips and Tricks
What are the different types of clamps?
Answer: There are the following types of clamps available in the market.
- Parallel-jaw clamp
- Pipe clamp
- C-Clamp or carriage clamp
- Corner Clamp
- Strap Clamp
- Wood screw clamp
- Spring Clamp, etc.
#12: Metal Detector
Yes, you are right! You are not in a treasure hunt mission. Actually, you are on a mission to create some antique  and artful wood piece, which definitely means a treasure for you. You are going to make it perfect, right? So you need to keep it metal-free. In this case, a well-designed and quality metal detector should be your first choice.
The device which detects the presence of any kind of metal nearby is called the metal detector. It consists of a handheld unit with a sensor probe that can be swept over the surface of wood you are currently working on. A quick scan by the metal detector can save your day by finding unnecessary metals from your wood piece.
Questions: What can metal detectors detect?
Answer: Metal detectors can detect a variety of items which include iron, copper, nickel, aluminum, brass, lead, gold, tin, silver, etc. The main purpose of the metal detector is to detect jewelry, coins, and other valuable metal objects.
#13: Chisel
Any woodworker that loves working with their hands will definitely need their own wood chisels. To create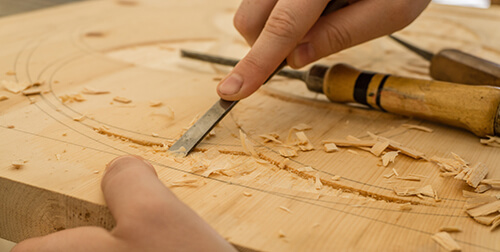 something that is high quality and elegant you must want to own a set of these tools. If you are the person who thinks artful pieces should be made by hand then this tool is for you.
As the power tool has some inherent limitations, wood chisels are great for creating a hole in the middle of a wood or shaving down rough edges. Imagine, you are doing woodwork and you need to clean out joints and saw cuts. In this case, you will need chisels to make your day. Chisels are made of steel and wood with a sharp edge in it.
There are several types of chisels based on their function ability. Because of their versatility bench chisels are the most commonly used woodworking chisels. You can perform a wide range of woodworking tasks by using this chisel. You want to fine pair of joints, you should definitely go for paring chisels.
To get smoother joint pairing chisels is the woodworking tools you don’t want to miss by any means. Another type of chisels that you must consider is mortise chisels. Mortise chisels are used to chop out mortise joints by hand. Socket chisels are another kind of chisels that built to sit on top of the handles cone.
Chisels are definitely important. But you’ll want to make sure that you know how to use it. and Also See the Vidoe: How to Use Chisel Perfectly.
How many types of chisels are there?
answer: There are different types of chisels. In most of the cases following types are available in the market.
- Bevel edge chisels
- Mortise chisels
- Sash mortise chisels
- Paring chisels
- Corner chisels
- Japanese chisels, etc.
#14: Height Gauge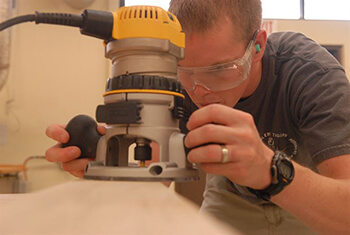
Now you are facing problems with measuring the height of your lumber during woodworking? Here is the solution for you. You can use a height gauge to solve your problems. This amazing woodworking tool is used to determine the height of your wood piece. Height gauge can be used for vertical and horizontal measurements as well.
Now, the introduction of digital height gauge would make your woodworking measurement easier than ever. Besides, with the built-in magnet on the bottom, it becomes easier to be absorbed to the surface of the measured object. Indeed this device saves a lot of time and helps prevent errors in your woodworking workshop.
Question: How accurate is a height gauge?
Answer: Although height gauge is a very useful tool, you should be aware of its accuracy. In most of the cases, height gauge has a measurement range of 0 to 200 mm, is precise to 0.02 mm, with + or – 0.03 mm of accuracy, and is suitable for scribing from a vertical base or for measuring small objects.
How many types of height gauges are there?
Answer: There are three types of mechanical height gauges which are as follows.
- Vernier height gauge
- Dial height gauge
- Digital counter height gauge
#15: The Level
Ever wonder how a level can be used in woodworking? If you are thinking about woodworking you must know how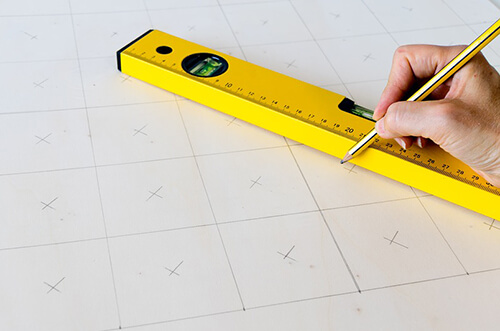 to perfectly read levels. It’s easy, but you need to master it by practicing a lot. Actually, when you are working on a project that is semi-permanently or permanently mounted depending on the surface of the earth, you must use a level.
In every wooden construction work, the other side has to be leveled carefully. You will not work to have unleveled doors or fences which is why you must level in your woodwork. There are several types of levels in the market, but you should be aware of the size of the level you are going to buy. 48 inches level could be the best choice for you although you can buy other sizes too. There is also some expensive digital level in the market which can make your woodworking time saving for sure.
How many types of levels are there?
Answer: The types of levels are as follows.
- Surveyor’s leveling instrument
- Carpenter’s level
- Mason’s level
- Torpedo level
- Post level
- Line level
- Engineer’s precision level
- Electronic level
#16: Screwdriver
The next woodworking tool I would like to mention is perhaps the most commonly used tool in any household work. Yes, you got the right guess, its screwdriver. This common tool has a wide range of use for screwing and 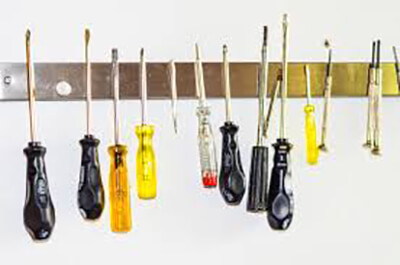 unscrewing screws. It has a handle and a shaft.
Usually, tough steel is used to make the shaft for resisting twisting. There are several types of screwdrivers in the market such as torque screwdrivers, powered screwdrivers, ratcheting screwdrivers. Torque screwdrivers will help you to tight a specified torque without damage.
Powered screwdrivers use electric power to run which is more useful in woodworking. You may also want to have a Ratcheting screwdriver as well. To deal with special screws with cross-shaped slots in their heads you will require a special screwdriver with a blade tip that fits the slot.
How many types of screwdrivers are there?
Answer: There are so many types of screwdrivers that are as follows.
- Flat Head Screwdriver
- Phillips Screwdriver
- Pozidriv Screwdriver
- Robertson or Square Screwdriver
- Torx Screwdriver
- Hex Screwdriver
#17: Feather Board
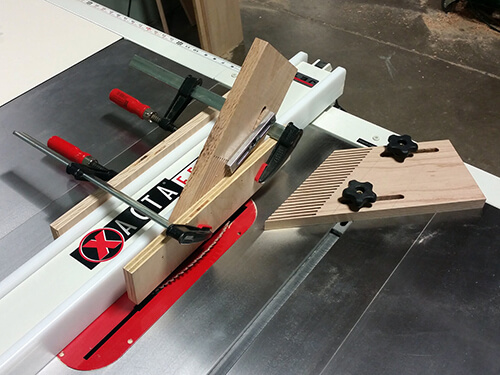
Achieving smooth and best quality end product should be the basic goal of every woodworker. To achieve smooth and quality cuts one of the commonly used woodworking hand tools is the feather board. You will use a feather board basically for two purposes.
During a cut by saw it will hold the stock up tight against the surface of the tool and the feather board is also used as a fence while you run it through. You just choose the right feather board, it will do the rest of the work on holding stock. If you don’t want to purchase one, you can make your own custom feather board on your own. It’s not that difficult. In fact, it will make your work easier with your own design.
What is the most useful function of a feather board?
Answer: Although there are so many functions of a feather board, a serviceable feather board can be shop-fabricated from an approximately 3/4 × 3 × 11 inch piece of straight-grained, defect-free woodcut crosswise at a 45-degree angle on one end.
#18: The Spokeshave
The spokeshave is the next woodworking tool on my list. It is a tool used to shape and smooth woods in your 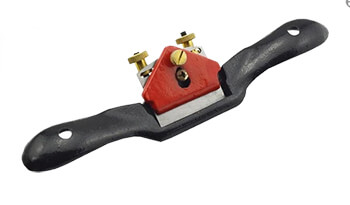 woodworking task. It is made of a wooden body and a metal cutting blade. Also, you may find a spokeshave with a metal body in the market. You will definitely love to have this amazing tool in your woodworking workplace to make your wood smoother.
What is the difference between a rabbit and a dado?
Answer: A dado is a trench or groove cut out by either a dado head cutter or straight flute router bit usually the same width as the piece to be inserted into it, a rabbit is similar only one side missing. These can be found in the simplest of woodworker books or mags. Both joints offer support and a gluing surface. Check Out: Review Of the 7 Best Spokeshave For The Money
#19: Card Scraper
You may be tired of thinking all about woodworking tools which make your working process easier. Now, you have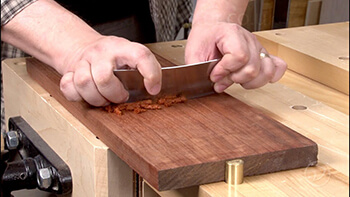 a new opportunity to find a tool that helps you in woodworking shaping and finishing.
Yes, you are reading the right one the card scraper. Card scraper is most useful for working with hardwoods and can also be used as a replacement for sandpaper. It’s usually made from high carbon steel.
In the market, you can find a wide variety of style scrapers which is provided by many manufacturers. You would love to use it in many purposes that will help you to make your woodworking process successful.
Why do you need a card scraper?
Answer: If there were a ten-dollar finishing tool that worked ten times faster than a sander, made almost no noise, worked on finishes between coats as well as on bare wood, and did the work of abrasives from 60 to 220 grit, you’d know about it, right?
And if there was such a thing, surely you’d already be using this miracle tool for cleaning off glue squeeze-out, taking wood directly from thickness planer to 180-grit finish, erasing layout marks, smoothing lacquers and varnishes, doing spot repairs and lifting dirty fingerprints, and doing a dozen other chores that a tear out-proof, ultra clean-cutting hand tool could do. Yes, I am talking about the favorite card scraper.
You also should know how to use a card scraper. and Video: How to Sharpen and Use a Card Scraper
#20: Brace
Among all of the tools, the brace is the most interesting tool you may find. It is a hand tool that is used as a bit to drill holes, normally in wood. When anyone applies pressure to the top it is automatically rotated with a U-shaped grip. U-shaped part is a type of crank which gives the brace much stronger torque than any types of hand-powered drills.
Usually, a traditional woodworking brace is used to bore holes which are often too big for a hand drill. As they are operated by a screw thread and cutting ages instead of power, you will love it for the cleaner work.
It will take more time to boreholes then electric drills but the result will be amazing. You can use it to create different-sized holes. Moreover, it always runs on your renewable energy which is an advantage of the brace over the electric drill.
How many types of drills are there?
Answer: The drills are of three types-
- Traditional drills
- Impact drills
- Hammer drills
#21: Shooting Board
Now I am going to tell about a unique woodworking tool named shooting board. A shooting board is kindly served 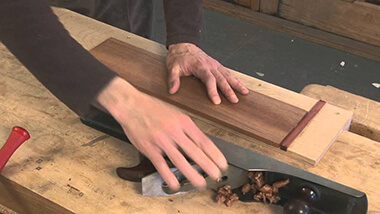 as a workbench but you can find many differences between workbench and shooting board.
It is a jig for woodworking which is a mix combo of a hand plane to trim and square up the edges and end of boards. You can find many specific reasons where you can apply a shooting board – jointing and end grain trimming. it is consists of a flat board, and the base with a stop at one end, which is similar to a bench hook and the board to be planed is rested.
You can also use different sizes or shapes shooting board which is uncountable in number for finishing your task in your workshop. now you must say happy using of shooting board!
What is a shooting board?
Answer: A shooting board is a jig for woodworking which is used in combination with a hand plane to trim and square up the edges and ends of boards. It would typically be used on a workbench. A plank or board with edges planed flat is called a shot edge board.
#22: Dial indicator
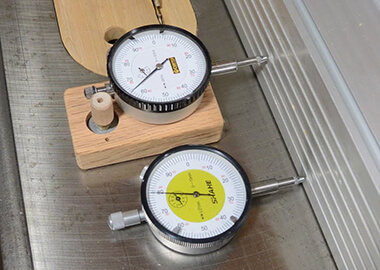 By reading the headline of this tool you may think which tool we use to indicate something dial maybe that refers to dial indicator. Well, you are not fully wrong. A dial indicator is also known as a lever arm test indicator or finger indicator, which helps to make a standard dial indicator a dial display is quite similar to a clock face with clock hands, the hands point to graduations in a circular scales on the dial which represent the distance of the probe tip from a zero setting.
We can say the dial has a fine quality to precise measurement. you can measure your minor increments which are not probably measured by any other woodworking tools but you can easily make your guess by using a dial indicator. its always shows the right one for your woodworking project. properly use of a dial indicator may reduce your working hours.
What is the difference between a dial indicator and a dial test indicator?
Answer: There are some differences between a dial indicator and a dial test indicator. Basically, a dial indicator has plunger-type contacts while a test indicator has lever-type contacts. Moreover, dial indicators are quite larger than the test indicators.
Power Tools You Must Have
When it comes to power, you can imagine doing a lot of heavyweight work within a short amount of time. Power tools would make your woodworking task easier than ever with high capacity. In this modern age, you just can’t imagine doing woodworking without owning some great power tools. Have a look in my list and you’ll be amazed to know about the power of power tools that can take your woodworking to the next level.
#23: The Jigsaw
If you are a woodworker you must have heard about this powerful tool to make your task easier than ever. The 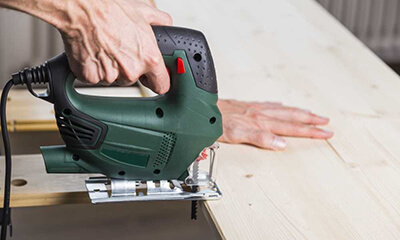 specialty of the jigsaw (which is also called a Saber saw) is it can cut through curves and complex shapes in wood.
Any softwood that’s no more than 1-2 in. thick and hardwood up to 3-4 in. thick can be easily cut by a jigsaw. In fact, it is a grandmaster of cutting shapes in a variety of materials. Due to its inherent nature matching the right blade to the type of material you’ll cut is the key thing you must consider when using a jigsaw.
If you are not a frequent user you can go for the basic model, but if you are thinking about doing the task like a boss you must go for a heavy-duty saw that performs better and has more features.
Watch Video: How to Use a Jigsaw
Questions: What is a jigsaw good for?
Answer: Jigsaw is one of the popular woodworking tools. The jigsaw can be used to make both straight and curved cuts in a wide variety of materials, including wood, particleboard, plywood, plastic, metal, even ceramic tile. The important part is it is comparatively easier to use.
How thick of wood can a jigsaw cut?
Answer: As jigsaw has about 4 inches long blade, you can expect a dipper cut with it. With a 4 inch blade, you can usually cut a length of around 3 inches.
#24: Table Saw
There are some amazing woodworking power tools you would be fascinated to own. Undoubtedly, a table saw is 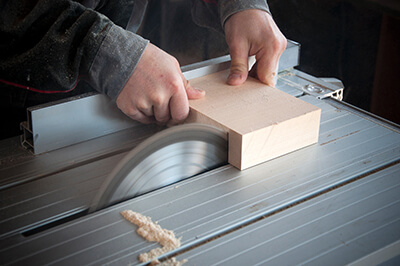 one of them. It’s a permanent fixture in your woodworking shop. A table saw is a woodworking tool driven by an electric motor that consists of a circular saw blade and mounted on an arbor. There are not so many tools that have multitasking ability.
You’ll definitely need a table saw in your woodshop as you can rip, miter, shape, square, groove and going by it. So, you need to choose the right one based on your task requirement.
Traditionally, the blade and arbor of the table saw were fixed, so to expose more or less of the blade the table was moved up or down. But, you will be happy to know that you can change the depth of the cut by moving the blade up and down which makes the work easier.
There are some classes of table saws that are compact, benchtop, job site, contractor, hybrid, cabinet, and sliding. As the name suggests, benchtop table saws are designed to be placed on a table and it is commonly used at the home. Although this kind of table saws have the least range of capacity, it can be of great help to you in performing a small woodworking project.
As this kind of table saw is not that expensive, it’s pretty much affordable for you. Now, if you are a carpenter or contractor you will need a more advanced type of table saw, job site table saws are highly recommended for you here. In most of the cases, you will find this kind of saw in a workshop performing the job, that is why it is called a job site table saw. Another type of table saw you may love is a compact table saw. It perfectly sits on a stationary stand and larger than portable saws. This kind of tool is so much handy to work.
Besides these tools, you may also find a contractor table saw helpful in your woodshop, but it is heavier and larger saw that is attached to a stand or base, often with wheels. Cabinet saws have an easily replaceable insert around the blade in the tabletop allowing the use of zero-clearance inserts, which greatly reduce tear-out on the bottom of the workpiece.
You’ll use a hybrid saw to get a feel of traditional cabinet saws with a comparatively lower price. You may also use mini and micro table saws and sliding table saws to make your woodworking easier.
Watch Video: How to Use a Table Saw [Woodworking For Beginners]
It is indeed an amazing woodworking power tools, but you must check the blade and motor before making a deal. A good well checked table saws would definitely enhance the productivity of your woodworking workshop.
What safety measures you must take while working with a table saw?
Answer: Table saws are pretty much useful and dangerous as well. You have to wear safety glasses, goggles, or a face shield at all times while using the table saw. You also need to use a dust mask, because, in most cases, the cutting operation is dusty. Try to avoid gloves, long sleeves, dangling jewelry while operating a table saw, because if you do so you could be in danger.
What should I look for in a table saw?
Answer: You should look for the following features in the table saw.
- Flat top- You’ll need a flat table for making your cut perfect.
- Fence type- Look for a parallel rip fence with a table and it should be perfectly locked down.
How many types the table saw are there?
Answer: The types of table saws are as follows.
- Portable Table Saws
- Benchtop
- Jobsite Saws
- Stationary Table Saws
- Contractor Saws
- Hybrid Saws
#25: Miter Saw
Okay, you can guess the power of compound miter saw already. it is a professional tool that can handle a lot of 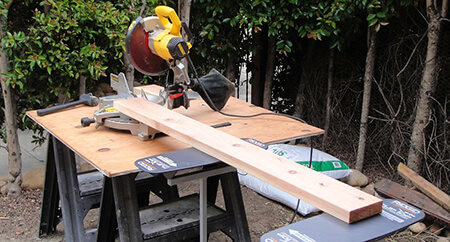 jobs. you can find this powerful tool with a 15 amp motor and 3800 RPMs and can handle large pieces of wood. you can tackle crown molding up to 7-12” nested and base molding up to 6-34” vertically like a boss. the most important part is this saw will give you a more accurate cut even without a laser guiding system.
A well-designed compound meter saw can cut wood, plywood, sashes, hardboard, or just about anything else you want to cut. You will want to choose a compound meter saw that is extremely user-friendly and according to your budget as well.
A perfectly shaped compound meter saw will even let amateurs to get a professional-grade experience as it is easy to control. well, don’t get confused, you will easily find the best one. But you must choose the tool that can be helpful and also less time-consuming in your woodworking work.
You would like to find a miter saw that can not only handle a lot of different kinds of jobs but also durable enough to be used repeatedly. With a compound miter saw you can make precision cards or you can quickly tear through larger more difficult materials which are really stunning.
Always try to choose a saw that has an ergonomic handle as you can lose yourself in a project and keep going without your hand starting to hard. A compound miter saw is indeed a great power tool in your workshop.
Questions: What kind of cuts can a miter saw make?
Answer: It is basically a power tool that can make a quick and accurate crosscut in a workpiece at any selected angle. It can be used for both cuttings of molding and trim. It is definitely an awesome tool you should look for.
#26: The Band Saw
Sometimes you need to invest your money to enhance the productivity of your workshop. Some woodworking 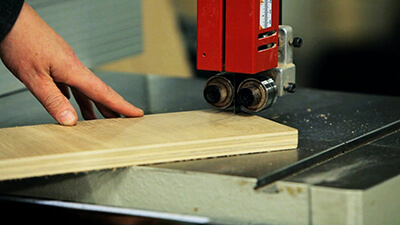 tools are very expensive but you will feel proud to have one. the next woodworking power tool I would like to mention here is the band saw. A band saw which is usually a power saw with a long sharp blade which consists of a continuous band of toothed metal stretched between two or more wheels to cut materials.
After reading this explanation you will love to use the band saw. A band saw has a massive capacity allowing you to rip pieces up to 12 inches in height while its reflectable blade guard will give you safety. Isn’t it interesting to have a woodworking tool that makes your work smoother and also consider your safety?
Moreover, you will definitely like it as it will save you a lot of time in your project. Choose a band saw that has a large table, easy-view, blade tracking window, and that also has a large capacity. you must also consider fast adjustment ability, the power of the motor and the quality of the rip fence. because a quality product always gives you more productivity and flexibility while working on a woodworking project.
Some band saw has a complex and hard initial set up procedure which is a disadvantage of the tool. besides, you must check the rip fence, the dust collection ability, size of the dust port, while buying a band saw. Also, check the blade changes procedure of your band saw, you definitely owned one to face any difficulty changing the blade of your power tool.
As you already know, the band saw is kind of expensive, you need to be extra careful before making a deal. A wrongly chosen product may waste your time and money both. please don’t get disappointed here, as you already have some idea of what to choose and what not to.
so, what is your plan to do with your band saw? different projects need different kinds of blades. moreover, if you are up to a project with softwood, you definitely don’t need a heavyweight power machine. there are lots of hard-working tools that can be used here, but a bigger project with more configurations must need a power tool. Here a perfectly chosen band saw will make your day.
Can I use a metal blade to cut wood?
Answer: The blade which is used for cutting wood should be different from the blade used for cutting the metal. You should always remember to change the blades frequently while cutting metal and wood. By the way, you can use a carbide-tipped abrasive cutoff wheel for cutting non-ferrous metal, for example, copper or aluminum.
Can I use a circular saw blade on a miter saw?
Answer: Yes, of course, you can use a circular saw blade on a miter saw. Infect, circular saw blades are specially designed for use in the miter saw.
#27: Radial Arm Saw
Wait a minute! Are you feeling bored? I gotta solution for you ever heard about radial arm saw, a wonderful power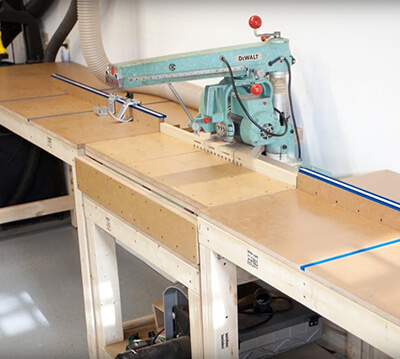 woodworking tool? there is no doubt that it is really a great creation in the woodworking industry.
Radial arm saws are an essential tool that becomes an unavoidable part of any rich woodworking workshop. you will do cross-cutting just like a boss with this amazing tool. people always remember the product that makes a memorable sign in their working process. Here we can mention the product which makes your work process more enjoyable is the radial arm saw.
Radial arm saw is highly functional and durable as well. but unfortunately is not a piece of cake to choose the right one. always check the quality of the saw and the power of the motor when buying this tool. few woodworking machines are as versatile as this tool you can do most of your woodworking work by using this tool.
The radial arm saw the entire motor and blade unit mounted on an overhead arm moves through the stock during crosscuts which makes it unique from any other stationary power tools. basically, they are not very portable, but heavy and bulky.
Although it is very costly, you can perform a lot of functions which includes crosscut, rip, cut bevels, form moldings, and even as a guide for the router. due to its versatile functionality, you will find it difficult to initially set up the tools. positively saying, you will surely want to learn some instructions before using this multifunctional tools.
in fact, when making tenons or slots for the shelf, the radial arm saw would be the most suitable tool to cross cut dadoes and rabbits. you will be amazed to know that, it can typically cut miters of up to 60 degrees to either the left or right. it also can cut bevels of up to 90 degrees, but only in one direction. in this case, it can be said that radial arm saw s more functional to cut more complex compound angles than a compound miter saw, but the real challenge would be to get the angles just right. although it’s not a popular tool in ripping, you can use it to rip your stock as well.
You must pay special attention to some factors when using this tool. the saw should always be with the blade guard which is really necessary when using it. always try to start your cut when the saw blade has reached its maximum speed.
You will like to control the speed of the cut to get safe and better results. and of course last but not the least always double-check that your hand that holds the stock against the fence is clearly away from the path of the blade. because your safety should be your first priority in your woodworking.
Is it dangerous who use radial arm saws?
Answer: this is a true fact that radial arm saws are a bit dangerous while using. The safety procedure of radial arm saws is not that great. It is less safe than a table saw for ripping, or a miter saw for crosscutting. But it is less dangerous than any power saw that has a circular blade
What’s the difference between a radial arm saw and a miter saw?
Answer: Usually both our table saw and radial arm saw are useful in cutting accurately. But there is a little bit of difference between them. A table saw needs space in the front and back when ripping, and when crosscutting the space will be needed to be left and right.
#28: Power Scroll Saw
Enough!!!now we are gonna introduce a real one! Really a real one! you can’t even think woodworking project 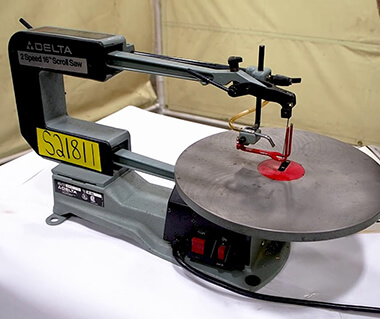 without a power scroll saw. It is a small electric operator saw used to cut intricate curves. so imagine that you want the speed and power of an electrical saw combined with the precision of a few handheld blades! it’s wonderful, right?
We got a small tool for you with a bigger blast. yes, you are guessing right, in this case, a power scroll saw would make your day enjoyable and comfortable. it has a very slender blade that can move up and down at between 400 to 1800 strokes per minute. you can perform both of exterior cuts and interior cuts by using this amazing woodworking tool.
What materials can be cut on a scroll saw?
Answer: You can cut a wide variety of material by a scroll saw which includes bone, leather, metal, rubber, and wood. The most interesting part is can cut intricate designs that are really outstanding.
Is a jigsaw and a scroll saw the same thing?
Answer: No, there is a difference between them. basically, a scroll saw was designed to do curved lines and plunge cuts, but a jigsaw does an average job here. But you can deny this a jigsaw has some other specialties that a scroll saw can do.
#29: Random Orbital Sander
We all know power tools make our woodworking works easier than ever. One of the handy power tools that you’ll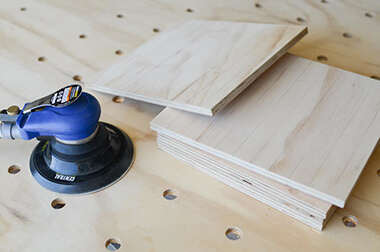 love to own is a random orbital sander. It is basically a hand-held power woodworking tools for sanding in which the sanding blade delivers a random-orbit action.
You’ll find three types of random orbital sanders in the market, which are electric-powered, air-powered and the final one is orbital floor sanders. Among them the handheld orbital sanders are popular.
Electric and air-powered orbital sanders are handheld, on the other hand, floor orbital sanders are a large rolling machine. If you are looking for sanding two pieces of wood that can be fastened at right angles, a well designed random orbital sander should be your first choice.
What is the difference between a random orbital sander and an orbital sander?
Answer: In most of the cases, the random orbital sander moves back and forth while an orbital sander moves only in a circular motion. This is the basic difference between them, but a random orbital sander leaves less swirl pattern on the wood.
#30: The Shop-vac
Sometimes, you’ll be confused with the type of tools. Sometimes you may struggle to consider some tools as 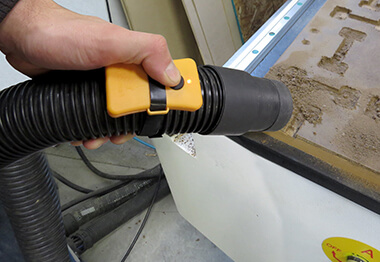 woodworking machines. You may get confused about the function of a ShopVac. But, trust me you’ll love these amazing tools that can be of so assistance for you during woodworking.
Imagine a scenario that you are working in your workshop and suddenly face difficulties with powdery sawdust that’s trying to enter into your eyes. In this case, a portable shop vac would be so helpful for you as that is going to clean up the dust from your workshop so smoothly that you could never imagine like ever.
So, now you can realize the shop vac is a specially designed vacuum cleaner for the woodworking workshop. This will keep your workshop and cutting line clean which is so important in your woodworking. Now, no sawdust can create an obstacle in your work, right?
Try to choose the good one with high power capacity in the motor. You want to make your work powerful, right? So, you should go for the shop vac that comes with a high amp that will ensure that the heavier work can be done without any interruption. But first, you should know how to use it.
How can I choose a shop vac?
Answer: You can easily choose a shop vac. just follow these steps.
- First of all, determine the size and capacity.
- Try to consider the performance you want.
- Check the right filter.
- Check the size of the house you will need.
- Check your blower preference.
- Try to choose a shop vac with tank drain
#31: Bench Grinder
Yes, you may already hear about a bench grinder. It is a woodworking tool that can be used for grinding, cutting or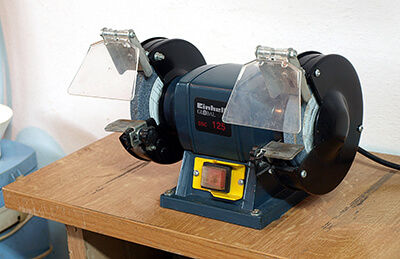 shaping the metal. You’ll definitely need a good one to make your workshop more perfect.
You are a woodworker that thinks woodworking is an artful work, right? You’ll love the bench grinder for finding the art in your wood piece. You’ve got to keep all of your chisels and other metal staff sharp.
You will also want to make your screwdrivers more functional. A bench grinder will make your day here. Just choose the best one and of course, you wanna follow the instructions step by step to get maximum of it.
Who invented the grinding machine?
Answer: According to history, John Wilkinson and later Henry Maudslay built the first horizontal boring machine and the first engine lathe, respectively.
What is a bench grinder good for?
Answer: Abenchgrider is good for many things. You can use it to dry abrasive wheels. You can also use it for sharpening cutting tools such as tool bits, drill bits, chisels, etc. Moreover, it can be used for shaping the metal roughly before welding.
#32: Surface Planer
Get a surface planer if you are a passionate woodworker. It may be not easy for you to choose a surface planer 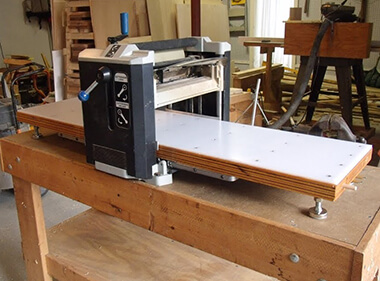 without knowing about this woodworking tool. Generously speaking it’s maybe a mindblowing tool in your own woodworking tool collection.
No one can deny the necessity and durability of the surface planer. A surface planer consists of three parts: one is a cutter head which contains the cutting knives; second is a set of rollers which can draw the board through the machine and the last one is a table which is adjustable relative to the cutter head to control the resultant thickness of the board.
basically, it looks like a wheel of a sewing machine. when you make your mind to use this tool in your woodworking workshop you should always use hearing protection and also check that your surface planer has a dust vacuum, otherwise be ready to face adverse situations with sawdust that is going to be produced from this machine.
Do I need a planer?
Ans: Yes, you can have it. A planner is extremely useful for serving three unique tasks.
- It makes the second page of a board parallel to another page.
- You can smooth rough stock by using a planer.
- It gives your stock the exact thickness you need.
What is the difference between the jointer and the planer?
Answer: The main difference between jointer and planer is The jointer always used to square up and flatten one face and A planer, on the other hand, used to make the second face flat and parallel to the first. However, A jointer will not allow you to easily thickness boards to a precise dimension and A planer was born for the task of thickness.
#33: Rip fence
The rip fence is basically a supporting woodworking tool that should be used with other power tools. Especially 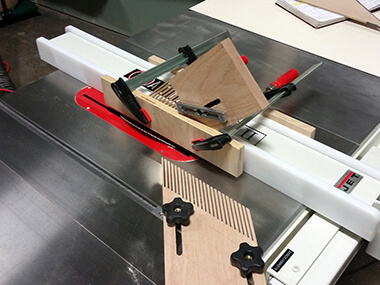 your table saw should have a rip fence. Go for a rip fence that has a fine-tuning adjustment and can be run parallel to the blade.
You’ll see some rip fences with an adjustment knob which is important for this tool to function perfectly. When buying a rip fence you should consider some special features of it. Just check that your rip fence would stay parallel to the cutting blade while functioning, which can make your woodwork more flexible.
What is Rip capacity on a table saw?
Answer: A table saw with a ripping capacity is verify by the distance from the saw blade to the maximum distance of the fence which can travel to the exact side of the saw blade. And the common distance is 28,30, and 50 inches.
What is the difference between ripping and crosscutting?
Ans: By ripping you can cut along the grain while Cross-cutting you can cut across the grain. The grain is very easy to cut; even if you had mechanical saw with few but large teeth you can cut as fast as straight and as possible.
#34: Jig and Dado
You’ll need a full range of jigs and dados to get the maximum benefit from your table saw. You already know that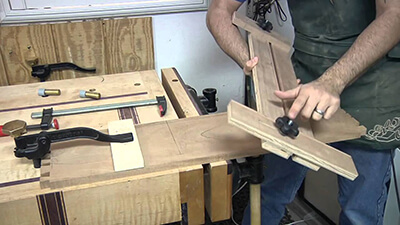 jigs are so much useful for tenons, tapering, panel-cutting and for many other functions. When a set of wood chippers sit between two shiny blades is called a stacked dado.
You’ll find it easier to cut grooves or remove a large part of stocks while using a dado. You can also perform a bigger cut, just adjust the width of the chipper. Choosing the right size is the main point here when you are going to buy a dado.
Generally, a 6-inch dado head would be the most suitable size for you if your saw size is 8-10 inches. You’ll definitely own a set of jigs and dados to increase your confidence in woodworking.
What is the difference between Fixture and Jig?
Answer: In metal and woodworking, both fixtures and jigs are essential tools to use. the key difference between fixtures and jigs is that a fixture is a work-holding device used to hold work in place. Whether a jig is a type of tool used to control the location or motion of another tool. Check Out: Kreg Jig Reviews and Buying Guide
How many types of jigs are used for?
Answer: There are many types of jigs people are using in the workshop. here some follow –
- plate jig
- box jig
- closed jig
- pump jig
- sandwich jig
- angle plate jig
- leaf jig
- special jig
- channel jig
- table jig
#35: Miter Gauge
Although the best way to use it is using with a table saw, a miter gauge is solely a powerful tool, because 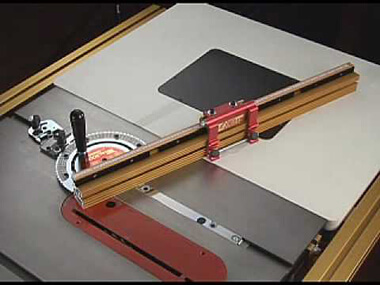 woodworking is all about doing the right measurement. In most of the cases, you’ll see a built-in meter gauge in every saw.
But it may create problems when making your cuts. To make a perfect cut you should be aware of your gauge which should slide smoothly in its grooves without being loose. Always fo for a T-groove meter gauge on your table saw which is more perfect in maximum cases.
Questions: What is a Mitre gauge used for?
Answer: A miter gauge is a device used for holding all kinds of workpieces and set angles while being cut on the band saws, table saws or sanded on stationary disk sanders. The miter gauge slides are being used on the machine in a slot on the worktable which is also known as a miter slot.
#36: Router
The router is one of the amazing woodworking tools on my list. I bet you’ll love to have it. The router is basically 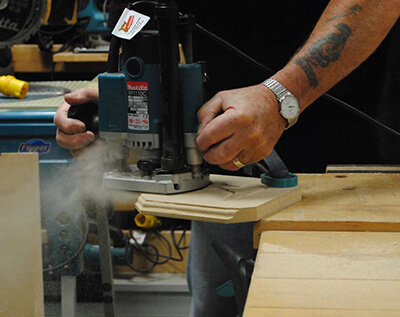 used to shape the edges of your work. It is really a versatile woodworking tool that has different types of functions.
If you can choose the right router it would help you in multiple functions that include grooving, rabbits, housing, Joints, hinge slots, drilling holes for dowel jointing, flutings, inlays, shaping, etc. Moreover, a router is extremely useful in dovetail joints, half-laps, mortise, and tenon joints and in tongue and groove joints.
Among all of the routers, portable routers are the type you will want to have which offers much more flexibility. They’re cheap, user-friendly and can deal with a staggering array of applications. Just have one of this smaller router, you will get clean and precise cuts with a professional touch.
Now, you may feel crazy to buy a router for your workshop. But you should consider some factors before buying it. The smart decision would be to choose a router with a fixed base. You’ll need to set the depth of your blade before starting your work, but you can’t adjust it during operation as it is a fixed base router.
On the other hand, a plunge base router will give you the opportunity to cut deeper into the wood and the interesting part is you can make necessary adjustments during your work. Another type of router you can choose is a palm router that can be used by one hand.
A mid-sized router is suitable for dovetailing, mortising and profile cuts. Large routers are designed to perform heavier works, but you’ll need more space in your workshop to store it. Always try to choose a router that has a great power capacity and can perform multiple functions without any disturbance. Besides, you must consider speed, cutting depth, router bits, router table to choose the right one for you.
The router is easier to use and is also safer comparing to other woodworking tools. Don’t avoid the instructions before using it. A woodworking router is a must-have tool for you for ensuring the success of your project.
Watch Video: Router Basics for Absolute [Beginning Woodworkers]
Different types of Router:
How many routers are there?
- Wired Router: A router which is a box-shaped device that connects directly to computers via “hard-lined” or wired connections is known as a wired router.
- Wireless Router: It is also similar to a wired router. A wireless router connects directly to a modem via a cable for receiving various internet data packets.
- Virtual Router: Virtual Router is a free and open-source software-based router. Using Virtual Router, users can wirelessly share any internet connection (Wifi, LAN, Cable Modem, Dial-up, Cellular, etc.) with any Wifi device (Laptop, Smart Phone, iPod Touch, iPhone, Android Phone, Zune, Netbook, wireless printer, etc)
What is the difference between a plunge router and a router?
Answer: The key difference between a plunge router and a router is The plunge router is a fixed base router at a cut depth of 1/4″, On the other hand, the position of a router is a bit constant and it protrudes past the base ¼” until you change the depth.
#37: The Jointer
Are you thinking about accurate square edges in your project? A jointer could be the best possible solution for you. Its specialty lies in accurately ensuring square edges. Trust me, you need a jointer first, before moving to a planer.
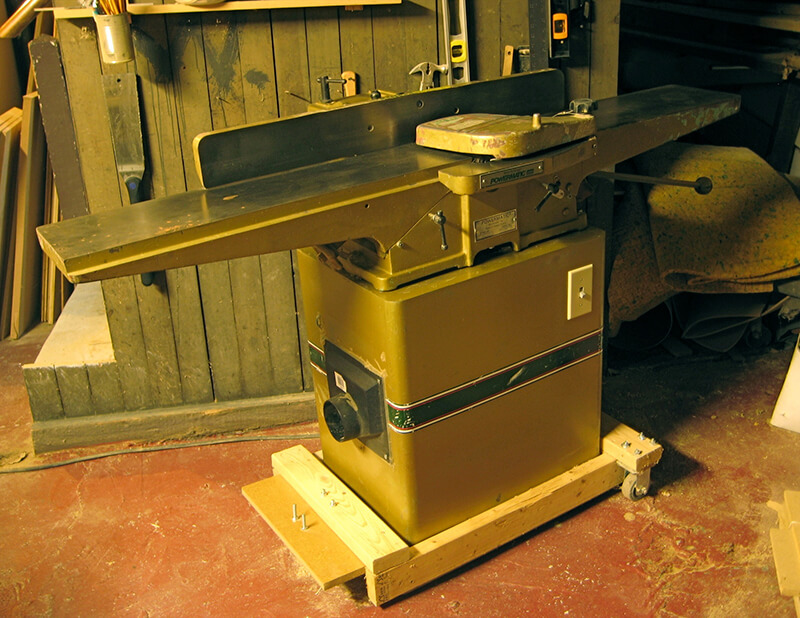
It’s kind of a foundation of your woodworking tools collection. Let’s think about building construction. What is the most important part there? yes, you’re absolutely right. A solid foundation is a basic requirement to build a multi-storied building. The same rules apply to woodworking.
If your boards are flat and edge and also straight and square, your build will have a much better chance of coming together with the way you want. But, you will be frustrated to build anything if there is no proper foundation. Your jointer will play the role to make a solid woodworking foundation for you.
If you have not made your boards flat yet, but thinking about taking it under a table saw, trust me you are in danger. A warped board can move around between the fence and the blade of the table saw, which can cause saw kickback and you may hurt from it.
So, first of all, make your board flat enough, a jointer will help you here. Basically, it has a cutter head that rotates at high RPM and it can be positioned between two tables. As per your requirement you want to set the infeed table and is usually at a lower height.
But you’ll see the outfeed table is at the same height as the cutting edge, which also supports the board as it cut. To cut more accurately and safely you also want to have a fence with your jointer.
A jointer is also used in making rebates in finished timber. You want to set the fence in the width of the rebate and the infeed table is set to depth. A jointer that is used for rebating has the outside ends of its blades also sharpened and set with a small clearance from the cutter head. Note that, a jointer cannot be used to create a board of even thickness along its length. You’ll need a thickness planer to do this.
You’ll have to ensure that the fence is at a 90-degree angle to the tables for square edges. Use your layout square for this task. Your fence should take most of the pressure during the work so that the wood remains straight up and down when the blades will do their work.
Always try to get the best jointer from the market. Before making a deal please consider it’s capacity, cutter head (try to get one with helical cutter head), power capacity, durability, accuracy and warranty period, etc.
You’ll also want to check the flexibility of the blade changing procedure of your jointer, because you may need to change it in the future. I can confirm that a jointer is definitely a woodworking tool that you must own in your workshop.
How is the size of a jointer determined?
Answer: Jointers are sized by the length of their knives, which determines the widest possible board that the machine can surface. A jointer can easily handle the lumber about twice as long as the bed, so the bed length along with the blade size dictates the size of material which is the tool that can be processed.
#38: Power Drill
A power drill or cordless drill is the next woodworking tool I am going to explore. I mean, you must own a good one. You just can’t imagine a woodworker without a power drill. You may see the cordless drill in many places, but those are more expensive and can’t perform all types of work that can be done an electric drill.
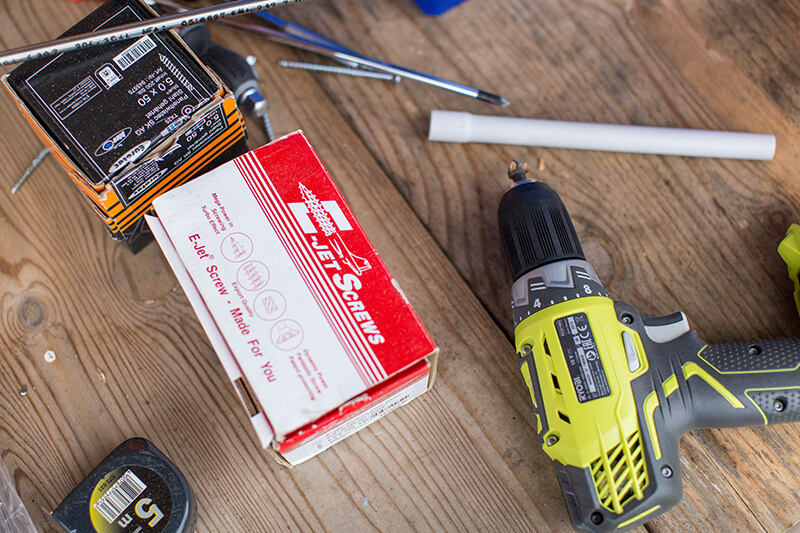
So, I highly recommend you to get an electric drill. Do you want to hear the most interesting part? Yes, the power drill is not that expensive and it’s pretty much affordable. If I want to elaborate you I must tell you that a power drill can perform several ranges and sizes of drills that a cordless drill can’t do ever.
A power drill is basically a versatile tool and can be used in multiple tasks. They come with a variety of different sized drill bits, and often also have regular and Phillips head screwdriver attachments. Familiarize yourself with the parts, functions, and safety precautions for your power drill before you begin drilling or driving screws.
But using a power drill machine is a little bit technical. You’ll have to choose the right size drill bit for a particular wood chunk. You also need to learn how to control speed and operate the drill so that it becomes handy for you for making a drill easily. Just get a good power drill and you will love it in your woodworking task.
How many types of drills are we can find?
Ans: There are many types of drills which are as follows –
- Hand drill
- Brace drill
- Corded drill
- Gimlet
- Push drill
- Crank drill
- Pin chuck
- Battery drill
- Air drill
- Table drill
- Pillar drill
- Drill press
- Impact driver
- Bench drill
- Antique drill
- Mill drill
- Radial arm drill
- Hammer drill
- Hex drill
- Magnetic drill
- Vertical drill
- Deck drill
- Autofeed drill
- Combi drill
#39: Drill Press
Not all holes can be perfectly drilled by a power drill, you’ll need a drill press in certain applications for doing the drill perfectly. To accurately drill large diameter holes it will give you more flexibility and you’ll see your drill is perfectly done.
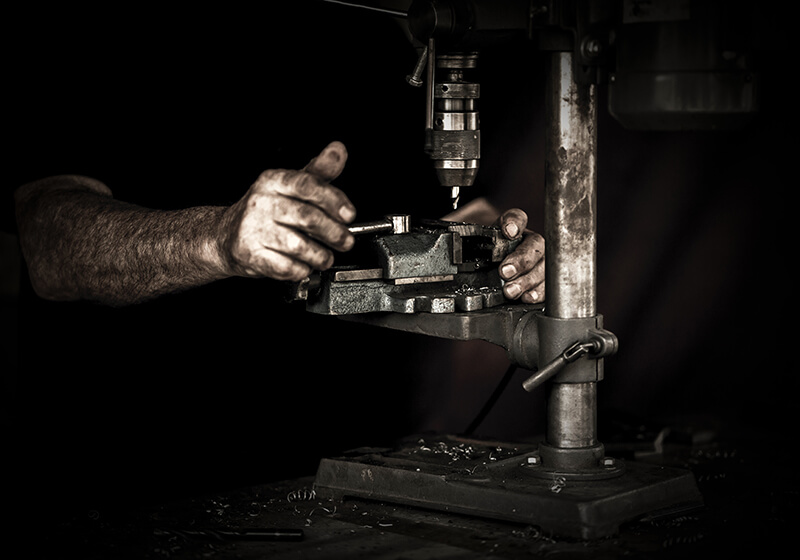
The drill press has so many special features and its ability to set the depth of the hole is something that makes the difference. It is also called a drilling machine which is widely used in drilling any hard substances. The drill is held in a rotating spindle and is fed into the workpiece, which is usually clamped in a vise resting on a table.
If you’re thinking about a drill press for occasional uses only, just get a drill press with only one spindle. You can perform a limited range of work by this kind of drill press. But for your heavyweight woodworking project that needs drilling of multiple holes successively or simultaneously, you should go for a drill press with multiple spindles.
It is so much handy and user-friendly so that you can use it at your ease. You know what? You can enlarge existing holes by using a drill press. Just get a boring tool for performing this task more perfectly.
Basically, a drill press lets you create holes more accurately even in harder substances. It consists of a base, column, table, and head containing drilling equipment. Go for a drill press that has adjustable elements in the height and position of the table. Unlike a hand drill, a drill press cannot be moved that easily, but if you are looking for drilling a big hole I bet, you are going to own it as it is so good in performing a big drill.
But you must know how to use a drill press perfectly. Without knowing the use, you will most probably end up hurting yourself with it. First of all, you should be careful in setting up the speed of the machine. I would like to recommend you to set up a faster speed when you are drilling wood, but go for slower speed while drilling metals.
Choosing the right bit for the right wood is always important. Every drill bit is not perfect for every size of wood. generally how the table moves depends on the model you are going to buy. So, go for a flexible one.
Gauging the depth is also important for performing a perfect drill with a drill press. Always remember to secure your workplace before starting your drilling process, because safety should be your first concern in woodworking.
There are so many models available in the market. Different model has specific functions and special ability. You must choose the right types of drill press for your workshop. For instance, I can say a drill press would be a great addition to your toolbox in the journey of your woodworking projects.
Watch Video: How To Use A Drill Press
When was the drill press invented?
Answer: Arthur James Arnot and William Blanch Brain of Melbourne, Australia who invented the electric drill in 1889 are known as the first inventor of the drill press. In 1895, the first portable handheld drill was created by brothers Wilhem& Carl Fein of Stuttgart, in Germany.
What should one look for in a drill?
Answer: we always search for a unique one. like-
- Clutch: It gives you greater control of the depth screws are driven.
- Chuck jaws: Maximum capacity on most drills is 3/8 inches.
- Speed-range switch: You can make it high while drilling and low for driving screws.
#40: Palm Sander
Feeling bored???
Wait no more. Let’s talk about a woodworking tool that is going to blow your mind.
Wanna guess something or what?
Yes, you’re so right. Literally, I am talking about the palm sander. This amazing tool will make your work 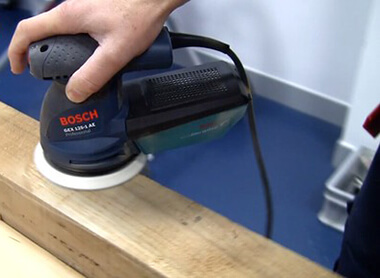 smoother and comfortable and you’ll also be able to save your time by using it. It’s basically a power tool that can easily fit in your hand which makes it so flexible to use. A palm sander is generally low in weight, easy to control and also less expensive.
The glasspaper sheet is generally attached to the pad with velcro that means it can be replaced easily. but you have to be more cautious not to sand patterns into your finished work with the palm sander.
The palm sander normally moves in a circular pattern or back and forth, so you should be extra careful when using it as it can cause harm to you if you can’t use it properly. You’ll definitely love to have this awesome woodworking tool in your workshop.
Furniture and Storage System you Must Have
You may agree with me that woodworking is actually an art. If you don’t have art and creativity in your mind, I am afraid woodworking is not for you. There are some furniture type tools and storage systems that will definitely help you to express your creativity more easily. You’ll surely want to keep your tools properly arranged. Let’s have a look to know more about the furniture tools and storage system to organize your tools so that you feel comfortable while working in your workshop.
#41: The Saw Horse
The name of this tool is interesting, right? Yeah, this tool looks like a horse sometimes. The sawhorse is one of the most useful tools that a craftsman or carpenter must-have in a construction project. The most interesting part is you can actually build your own sawhorse like a boss. But, you’ll need some other tools like a circular saw, tape measure, hammer, nails and an angle square for building your own set in your workshop.

A sawhorse has a lot of use in your woodworking workshop. Let’s suppose, you need a secure place to make a cut or you need a support system for working with plywood or other rigid structure in your project, but you don’t have a workbench there, unfortunately. In this case, an easily built sawhorse will definitely solve the problem undoubtedly. Check out: Best Saw Horse Reviews and Buying Guide.
How tall should sawhorses be?
Answer: Most of the sawhorses gives you an exact working height of 24 to 27 inches. It can guess that is a comfortable sawing height for most people. But if you are on the short or tall side, you might want to consider a model with adjustable legs, such as the Tote-a-Horse.
Why we all called it a sawhorse?
Answer: It has many names but we know it by the name of the sawhorse. A sawhorse is a beam with four legs to support a board or plank for sawing. It is also known as a mule and a short sawhorse is known as a pony. It may also be a rock for supporting logs for sawing, which is also known in the US as a sawbuck.
#42: The Work Bench
You will find many styles of woodworking benches each reflecting the type of work to be done. A workbench is basically a table used by woodworkers to hold workpieces. You will find it heavy and rigid to keep steel while the wood is being worked.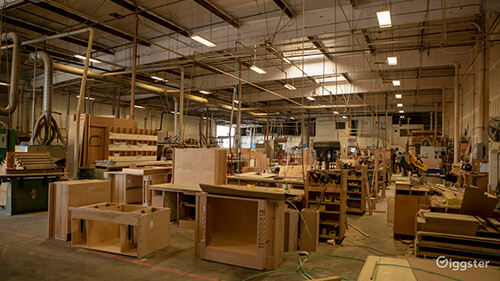
There are many amazing workbenches in the market that comes in many sizes but the most interesting part is you can make it in your workshop according to your requirement. A well-designed workbench is important for the success of your woodworking project.
Trust me, you’ll need a workbench or work table in your project. It’s like a support system when you are working with wood or other rigid structures. You can use a portable workbench or it can be fixed. Whether fixed or portable get a set of workbench. But remember one thing that, your room size is important here.
You don’t want to have a giant size workbench for a small room, right? But if you can confirm that you got a really larger room, I am gonna recommend you a double-sided workbench, that is so much flexible to use from both sides of the table.
The good news is you can also build your workbench in your workshop just like a sawhorse. In fact, you can collect different patterns for building a workbench and it’s not that tough to build one.
But if you are up to buy a workbench, try to choose a good one that comes in a variety of sizes. A perfectly shaped workbench is a must-have tool in your workshop for performing any type of project successfully.
How many types of the workbench are there?
Answer: There are many types of workbenches which we can easily use in the workshop which are as follows:
- Table Workbench
- Cabinet Style Workbench
- Portable and Multipurpose Workbench
- Power Strip Workbench
- Woodworking Workbenches
- Metalworking Workbenches
- Jeweler and Watchmaker Workbench
- Gardening Workbenches
- Art and Sculpture Workbenches
- Laboratory Workbenches, etc.
#43: The Tool Storage System
Who likes a messy man who leaves things piled around? No one likes a messy man. You’ll definitely love to store your woodworking tools properly. In this case, a well-designed tool storage system is a complete solution for you.
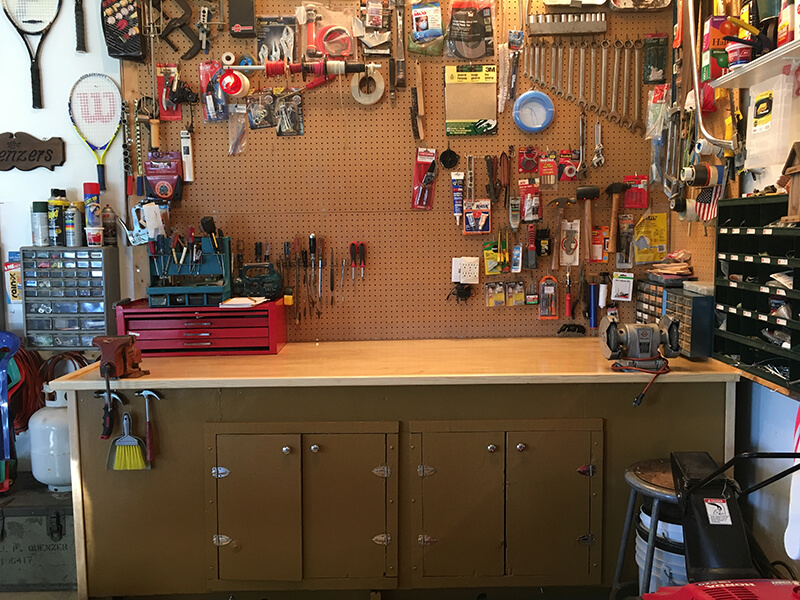
It’s totally up to you that how you are gonna arrange your tools. For instance, you may want to have open shelves or a locking cabinet could be your first choice.
You’ll love to learn how to build and install a space-saving, wall-mounted, hinged tool storage system in your workshop. You may consider yourself lucky to have a workshop for your woodworking projects, but having too many tools, on the other hand, make it difficult to store them properly.
But this problem can be solved if you follow a proper way of storing and gathering your tools so that you can find your preferred tool just at the moment you need it. A perfectly shaped and custom made locked cabinet will help you lot in this regard.
Also, a custom and bespoke drawer dresser would be so much helpful for you for arranging your hammers, nails, screws, screwdrivers and other similar tools, etc.
There are so many supportive tool arrangement systems that you can use to organize your tools. In this case, I would like to mention Pegboard Reviews and Buying Guide
So, what is a pegboard?
Pegboard is basically a perforated hardboard that is pre-drilled with evenly spaced holes that are used to accept pegs or hooks to support your various woodworking tools.
So, first of all, try to think a little bit about how you want to organize your tools, then try to find your desired tool storage in the market.
You can also try to make a custom order your tool storage which could be more user-friendly. Indeed, a well-designed tool storage system will help you a lot to store and arrange all of your important woodworking tools.
How do you store tools?
Answer: You can store tools in many ways. Like-
- First of all, you have to find the parts, locate cords, bits, nails, and screws and properly organize them.
- You can clean out the dirt and debris from tools.
- You can also set up racks.
- You can also create a library
- You can also clean out the junk and clutter and make a space only for tools.
- Delegate a portion of your garage, shed or basement closet as a place to store.
How do you place to store tools safely?
Answer: you have to follow the instruction which is given below:
- you have to store in a safe, dry place
- Use original cases
- you should invest in sturdy storage containers
- you should clean them properly
- Go vertically
Control Items You Must Have
There are some control items in woodworking that play a significant role in ensuring the proper usage of all of your existing tools. Besides, these tools are also important as they will help you to know more about safety during woodworking.
#44: The Manual
Did you ever think about the function of manuals that come with your woodworking tools? Yes, you are right. Everyone should read the manuals before starting to operate any woodworking tool. This is really important. None of us came into this world as a knowledge scholar.
You’ll have to master your woodworking skills. A manual will definitely guide you in your woodworking journey. Hand saw or the miter gauge, it doesn’t really matter, you will have to follow the manuals properly for almost each and every woodworking tool you have.
You have to learn about new skills to master it. Without proper learning, you will be ended up operating your tools wrongly. Most tools that returned to home improvement stores as “defective” simply were not used according to instructions. Learning is a must. So, try to follow each and every instruction written in the manual.
Wait a minute! You’re dealing with the woodworking tools that can be worth thousands of dollars that can be destroyed by a single major mistake or in other words those can cause you a serious injury. Don’t you think now that reading the manual is necessary and should be the utmost priority in your task list?
Choose a drawer file cabinet to keep all of your manuals and warranty documents. I would recommend you to make a separate file for each tool, you don’t wanna lose any of the instruction or warranty documents of your tool, not even a hammer.
Try to follow a pattern for your filing process, for example, it could be based on your tool type. If you want more safety, get a magazine protector and rest will be assured. Just make sure that your manuals are safe and stored in a way so that you can find them easily.
If you want to be perfect in your every project it is highly recommended that you must read the full instructions and understand the steps carefully, at least for once. Reading manuals mean you know all of the health and safety issues related to the tool and you can ensure the safety of yourself and surroundings while using the tool.
In most of the cases, your manual is literally a troubleshooter for you. It will contain all the information to troubleshoot the problem if you face any during your woodworking project.
This is really amazing as now you can save a lot of time and can invest in other projects. Finally, you will love to store your manuals and warranty documents safely and that should be found easily in time.
Question: What is a manual?
Answer: A manual is a book that will tell you the complete procedure of using the tools. Literally, it will be your little friend in your journey of woodworking. To become a perfect woodworker you should first learn everything related to your tool. Otherwise, you will end up hurting yourself or damaging your tool.
#45: The Safety Equipment
“Safety should always be your major concern.”
So, you love woodworking. It may be your hobby or profession or it could be your passion as well. But when it comes to safety always remember that if you are not safe, you can’t continue it without any further interruption.
So, try to ensure a safe environment in your workshop. You’ll be so happy to know that there is a lot of safety equipment that can help you in this purpose. Safety equipment is a kind of equipment that serves only one purpose which is ensuring the safety of the user.
In a project, by using safety equipment properly you may save a part of your body which is irrecoverable. Try to go for push sticks, feather boards to ensure the safety of your fingers.
As I told you earlier, read the instructions carefully. Reading the manuals and knowing the procedures properly could save your day and keep you safe during any woodworking project. Try to have the proper backup when you feed material through machines and always try to use the machines correctly.
Ever heard about safety glasses? If you don’t want to lose your vision too early please wear safety glasses when you are using woodworking tools, especially power tools. Always try to choose good quality safety glasses because it’s really important to ensure the safety of your eyes.
If you think that your power tools like a drill press or jointer are not working properly make sure that whether it will be safe or not to operate now because safety should be your number one priority here. So, be safe always, even in your woodworking projects. Just wear your safety equipment first and no doubt that you’ll feel more comfortable and safe than ever.
Question: Why do I use safety equipment?
Answer: The math is so simple here! Do you want to be safe? Wear some good safety equipment. Safety equipment will ensure your safety so that you cannot harm yourself while woodworking.
Final words
Finally, you got it. Now you have a complete idea of the best 45 woodworking tools that every woodworker must have now. As you already know from this article there are a variety of woodworking tools that can be classified in many ways.
But the key point is, you must choose the tools as your need and requirement. Each and every tool that I have discussed here has some unique function and ability. Every tool is important from their perspective. It is your decision to decide which tool will be more suitable for a particular task or project.
Hand tools can do a lot of tasks for you, but I must admit that power tools are really insane. But whenever you use woodworking tools try to take safety measures first. Because you have to be safe first to become successful in your project. To make sure that you can use your tools for a long time always try to follow each and every instruction that is mentioned in the manual.
Trust me, it’s really important. Many people think that reading a manual is completely a waste of time. No, it’s not. It actually saves time. Woodworking is not something that you will learn by trial and error. You can do it anyways. But of course, it’s not the perfect way.
Think about it. We are talking about some equipment here that will cost you even thousands of dollars. So, be aware of reading manuals in the correct way. Also, you should make separate files for each tool for keeping your manuals and warranty documents safely.
Moreover, you should think about the perfect tools storage system. You’ll not want to destroy your favorite tool just because of your careless, right? There are so many tools storage systems in the market.
But try to get a good one. In fact, it’ll be more good if you can build your custom tools storage system. It will help you to arrange all of your tools in a properly arranged way and you’ll not face any problems to find your tools during work.
Woodworkers are a creative person. They express their creativity through their work. Each woodworker deserves the best tool for his project. I believe, “a perfect tool will act as the voice of a perfect woodworker”. This list of 45 woodworking tools is indeed a complete guideline to choose the perfect tool for you.
Table of Contents

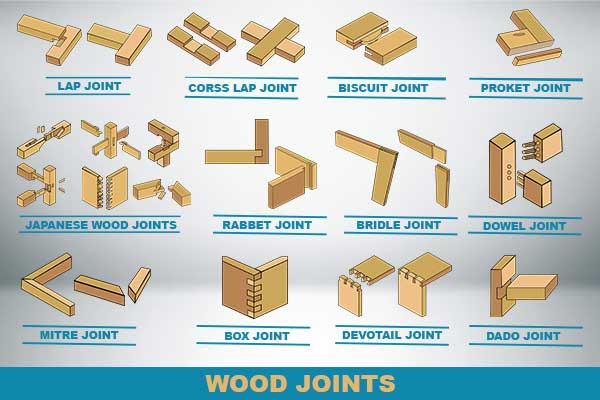


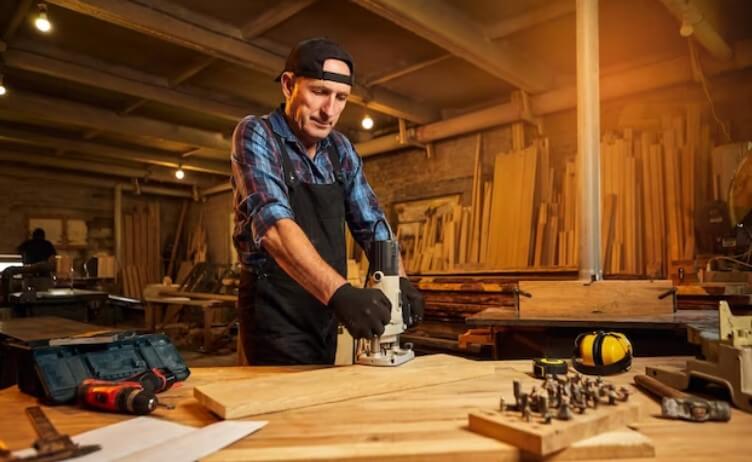
![A Complete Guide on Wood Screws [Types of Screws]](https://woodworkingarena.com/wp-content/uploads/2021/09/Wood-Screws-Types-of-Screws.jpg)