Easier Ways to Use a Wood Router
A wood router is a powerful tool that comes with a shaped cutter which is used in carpentry. The purpose of using a router is to make grooves for joints, decorative moldings, and carving various shapes into wood. A router has an electric motor which is mounted in the router vertically and there is a collet attached to the end of the motor’s spindle which is used for connecting various router bits or cutters. Different profiles can be made onto the edge of a board by using these router bits.
Why Should I Keep a Router?
Router is a very powerful woodworking tool which is versatile for its light-weighted feature. Because of its lightweight, you can carry it with you wherever you want. It is a very common woodworking tool that is well-acquainted by all woodworkers. You can do both functional and decorative work with a router. A router will allow you to use it on wood, metal, plastic, and laminates for cutting, trimming, and shaping them. More than hundreds of router bits are available which will offer you to use the tool for different purposes and to make different patterns. If you are confused about using a router, you can follow the below applications we are going to mention.
Cutting Fancy Edges

A router is mainly used for decorative work. You may decorate the edge of your workpiece with a router from a simple edge. A wood router is used to make smooth and clean edges on both straight and curved edges. You can make these cut on a narrow piece of wood as well as on multiple pieces of wood.
Rout Circles

Sometimes we need to cut our wood piece into a circle shape. You can cut a circle by using a band saw or a jig saw. But a circle which is made by a wood router is more accurate than a circle made by a saw. You just need to make a trammel that will extend from the center of the circle to the edge of the circle.
Making Frilly Mold

It is the most amazing thing you can ever do with a wood router. You can create stylish and frilly patterns by using different bits of the router. These patterns can be used for doors, windows, chair rails, elegant furniture in one word for decorative purpose.
Making Dadoes with Less Effort

Dado means a groove cut in the middle of a piece of wood. You can use a saw to cut a dado profile. But a dado profile made by using a router with a straight bit is easy and accurate in comparison. There are two types of dadoes that are very common in the woodworking process and they are- through dado which runs between the edges and both ends are open of this cut; and the other is stopped or blind dado which stops before the cut meets the edge of the surface. This blind dado hides in order to provide a cleaner look.
Cutting Clean Rabbets

The rabbet is a kind of dado. The difference is a dado is made in the middle of a piece of stock but a rabbet is made on the edge of a piece of stock. A rabbet is mainly used to make a joint with another piece of wood. A rabbet cut can be used in making doors, windows, cabinets, and so on. The combination of a rabbet and a dado make the joint stronger. Though it increases the strength of the joint it is easy to construct this rabbet cut.
Cutting Dovetail

Dovetail is a joinery technique most commonly used in woodwork. Dovetail profile makes the joint strong and sturdy. A dovetail joint can be made by using a saw. But a router can make it precisely and quickly. For making this profile with a router, you will need a dovetail router bit. There are four kinds of dovetail profiles: through dovetail joint, half-blind dovetail joint, sliding dovetail joint and secret mitered dovetail joint. Forasmuch making dovetail is tricky work, you need to be careful and make a few test cuts before routing on your workpieces.
Cutting Straight Groove

Groove cutting is one of the most important works for woodworkers. For making a straight groove, a guide fence is needed as an accessory. First, you need to set the guide fence according to your cut. Then set the depth of bit and start to rout.
Re-Creating Patterns

Re-creating means create something again. We all know that routers have been used to make designs, also to cut grooves and patterns. If you have undowered wood pieces like a table with broken legs, old door pieces, used furniture, and things like these, you can re-create patterns and designs on them just using your wood router.
Recessing Door Hinge

You can use a wood router to recess door hinges. In that case, you will need a router jig to cut spaces for the door hinge.
Choosing Perfect Router
The router is a versatile, portable power tool. Yet “which one will be perfect for you?” is slightly difficult to answer because different routers are used for different purposes. So the amplitude depends on how and why you are going to use a router.
If you are a beginner and want to do some decorative edges only and besides you have a limited budget, you can choose a trim router. Because you can buy it at the cheapest rate and also it will provide you the least amount of power which is helpful for the beginner woodworker.
If you are going to use your router for cutting circles, large dadoes, and tabletops and going to use it on thick materials, then you can buy a fixed base router. A fixed base router is a kind of router that is locked at a fixed place and the fixed place is the base of the router. In these types of routers, the cutting bit remains fixed always. You can use it for home working.
But if you are going to do heavy works and want to continue woodwork professionally, you can only buy a plunge router or a combo router. By buying a combo router kit, you can get facilities of both fixed base router and plunge router.
Shank Router Bits: ½ inch vs. ¼ inch

Router bits come in a variety of shapes and sizes which make the router versatile. Most of the bit types can be categorized into two sizes; ½ inch shanks and ¼ inch shanks. In most routers, the collets are fit for both sizes. Now the question is which one is better. The answer is: ½ inch shanks are better. But sometimes, ¼ inch shank would be the only option.
Tool’s Sound Signal
You must recognize the sound of the tool which will tell you when you have to push softly and when you should stop. If you push your tool too hard, it will create a groaning sound which means do not cut so much at a time. When your tool reaches its full speed and cannot get anything to cut, it will create a lonely squeal sound which means you should start cutting. After using some days, you can understand the meaning of each sound created by your wood router.
Straight Edge

One of the most important things we should follow when working with a router is starting with a straight edge. Before making any profiles, make sure that your workpiece has a straight edge. Then you can make dadoes, grooves, or any other profiles.
While shaping a workpiece, you have to start at either edge and finish in the middle. This will save your workpiece from tearing at the corner.
Router Jigs, Guide Bush and Template

Router is very easy to use and router jigs make it easier. Jigs help to hold the workpiece and also used as guide for our power tool. These jigs enable us to make tiny and accurate adjustments while positioning the work piece.
A router guide bush is a circular flange that acts as a small ring fence and protrudes below and helps to position the cut. Using a guide bush is very important for accurate work.
Sometimes, we need to cut something duplicate and something with odd-shaped for our woodworking projects. For these purposes, a router and a template will help us to get effective results in the shortest time.
Adopt Expedient Router Speed
A router’s motor may spin 25000 times in a minute. If we count it in per second, then the rotations number will be more than 400 times. But beginners cannot stand such speed. So they can adjust the speed of motors and control the spinning times in a minute.
Installing a Wood Router
As we gather enough knowledge about the router, let’s start using the router.
First, choose a router fit for your work and make sure that the router is not plugged in.
Then choose a convenient router bit for work.
Fasten the Bit
To fit the router bit, turn over the router and loosen up the collet nut. Then input the bit in the collet and tighten up the collet nut with the help of two ranches so that the router bit won’t be able to move. If the router bit move a little bit, it will hamper our work and we cannot get clean cut.
Synthesize Router’s Depth
The next step is adjusting the depth of the router. The router’s depth adjustment fully depends on how much you want. To ensure accurate depth before working, we can run the router over the wood in a small area for a test and see how our cuts going to look like. If necessary, change the depth adjustment and start to use the router. It’s easier.
Then switch off the router and plug the router in for electricity supply.
Grabbing Router
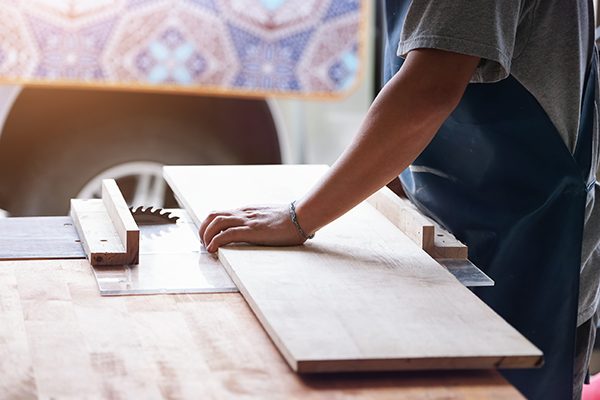
Use both hands to grab the router firmly. After placing your workpiece on the bench, hold the router with both hands resolutely and wait till reaching the router at your desired speed. Then start cutting your workpiece with the router.
Get Along with the Speed
It’s really shocking when a router starts spinning or routing. So be ready to start and put both hands on the wheels of the tool when the router is going to start. After that, place the router close to the edge of the workpiece and start to gradually move the router after turning on the router.
Moving to Right Direction
Router’s spinning direction is the most important thing we should care about. Or else the place of cut would be bumpy and rugged. The motor of the router always turns in a clockwise direction. You should always route the tool in the right direction. Otherwise, you cannot get an effective cut.
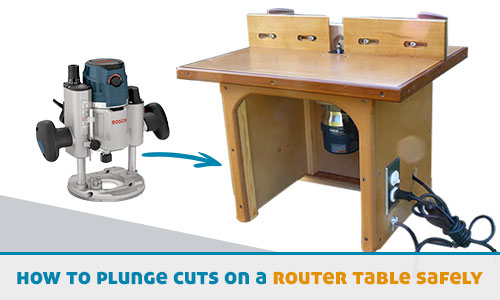
Aptness of Router Table
A router table is a useful router accessory that allows the router to work upside down and makes you able to fix the router on the table. When you mount your router upside down, it will propagate your router’s working capability. Without a router table, it is hard to work with a router. There is another avail of using a router table. Instead of running your router over the wood, you can run wood over your router and this will allow you to see the cut. But you must be aware of the tightness of the table’s screws.
Mounting a Router
A router can be mounted on a bench or router table upside down. In that case, the base plate of the router would be mounted to the underside of your router table. Turning router upside down has some benefits such as:
- It dilates the router’s working capacity.
- Easy to route in this way.
- Able to hold the router with both hands safely.
- The movement of the bit is visible so you can see the cutting way.
Safety Precautions
For safety purposes, everyone should take some precautions. Everyone who are intend to use router must read the manufacturer’s instructions and follow them strictly while using any power tool. Additionally wearing safety glasses and protection is a must for every user. Pay attention on the movement of your hands and your hands cannot come ahead the way of the router. Check router bit’s sharpness and tightness before installing it, otherwise obtaining clean cut is impossible.
Conclusion
The wood router is the most common woodworking tool which provides various cuts with accuracy in a very short time. So I hope you understand how important a wood router is. That’s why; you should know how to use a router. This article may help you to know about it. We all know – “Practice makes a man perfect”. So there is no alternative if you want to become a master woodworker without practicing.
Happy woodworking!
Table of Contents
![How To Clean Stainless Steel Appliances? [Tips & Tricks]](https://woodworkingarena.com/wp-content/uploads/2018/08/Stainless-Steel-Appliances-1-768x511.jpg)