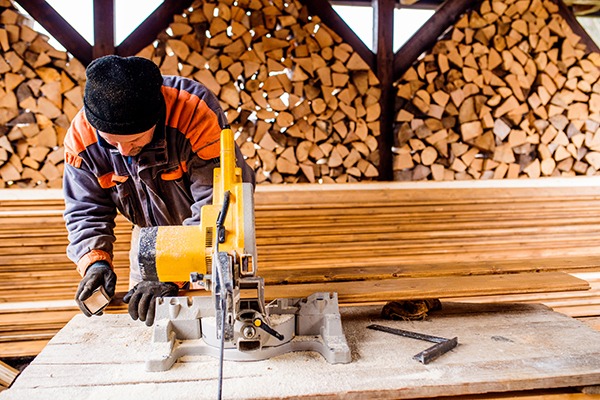
How to Set Up a Woodworking Workshop: A Step-by-Step Guide
Woodworking is an art that requires creativity, patience, and precision. From designing a piece of furniture to constructing a custom home, woodworking has an endless potential to transform ideas into reality. But, the success of any woodworking project depends on having the right tools, materials, and a workspace. Whether you are a seasoned woodworker or a beginner, setting up a woodworking workshop can be a daunting task. The good news is, with the right guidance and planning, anyone can create a functional and efficient workspace that will inspire creativity and lead to satisfying results. In this article, we will guide you through the process of setting up a woodworking workshop, step by step. From choosing the right location to purchasing the necessary equipment, we’ll cover everything you need to know to create a space that is safe, organized, and conducive to your creative pursuits. So, roll up your sleeves, grab a cup of coffee, and let’s get started on the journey of building your dream woodworking workshop!
Factors to Consider for Determining the Space of Your Woodworking Workshop
 When setting up a woodworking workshop, there are several factors to consider. One of the most important is the size of the space you’ll need. Make sure the workspace is large enough to move around freely and store your tools and materials based on the size of the projects you plan to undertake.
Another important factor is the location of the workshop. Look for a well-ventilated and well-lit area that’s free of hazards. Avoid areas with dampness or moisture that could potentially damage your tools and materials.
Ensure that the space has adequate electrical outlets to accommodate your tools and machinery. If necessary, consider hiring an electrician to install additional outlets.
Access to the workshop is another consideration. Is there a door that’s large enough to accommodate larger projects? Will you need to make any modifications to the space to accommodate your needs?
Finally, keep in mind the impact of noise on others around you. Woodworking can be noisy, so choose a location that’s isolated enough from other people or buildings to minimize disruptions.
Determining Your Workshop Layout
 Setting up a woodworking workshop requires careful planning to create a safe and efficient workspace. It is important to consider several factors when organizing your workshops, such as workflow, storage, lighting, machinery placement, and flexibility.
To start, create a rough sketch of your workshop layout before moving any equipment or furniture. This will allow you to identify potential problems and create a visual reference for your workspace.
When placing your tools and materials, consider your workflow and plan for easy access to your workbench and storage areas for maximum efficiency. Adequate storage space is also important to keep your tools, materials, and finished projects organized. You can consider adding shelves, cabinets, and pegboards to maximize storage.
Good lighting is essential for safety and productivity. Plan for adequate lighting by adding overhead lights, task lighting, or natural light if possible.
When placing larger machinery such as table saws, planers, and jointers, ensure there is enough room for safe operation and ventilation. It is also important to create a designated area for applying finishes that is well-ventilated and away from your other tools and machinery.
Finally, plan for flexibility as your skills and projects evolve over time. A well-planned workshop can be adapted to meet your changing needs.
Lighting Tips for a Well-Equipped Woodworking Workshop
 Choosing the right type of lighting is crucial for a woodworking workshop. For general illumination, consider overhead fluorescent lights or LED panel lights that provide bright and even light. For task lighting, such as on your workbench or at your table saw, opt for LED task lights or flexible arm desk lamps that provide focused and adjustable light.
Properly positioning your lights is important to avoid shadows and glares that can make it difficult to see your work. Aim for even illumination throughout your workspace by strategically placing lights around your workbench and other areas where you’ll be working.
Natural light can be a valuable addition to your woodworking workspace. If possible, position your workspace near windows or skylights to take advantage of natural light. Natural light is not only more flattering, but it can also reduce eye strain and fatigue.
Installing dimmer switches can be helpful in adjusting the intensity of your lighting to suit different tasks or times of the day. For example, you might want brighter lighting for detailed work, but dimmer lighting for sanding or finishing.
Investing in high-quality bulbs that offer bright, even light and have a long lifespan is essential. Look for LED bulbs that are energy-efficient and have a color temperature that mimics natural daylight. High-quality bulbs will not only improve the overall look of your workshop, but they will also save you money in the long run.
Choosing the Right Tools for Your Woodworking workshop
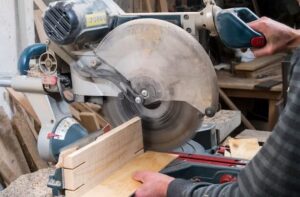 Woodworking can be a rewarding hobby, but it can also be a challenging one, especially for beginners. When starting out, it’s important to consider the types of projects you plan to work on, as this will determine the tools you need. Whether you’re making furniture or smaller items like cutting boards, you’ll need the right tools for the job.
- Circular saw: A circular saw is a versatile and portable tool that can make straight and angled cuts in wood, plywood, and other materials. It’s ideal for cutting lumber, panels, and sheets and can be used for many projects. Circular saws come in corded and cordless models and can be fitted with different blades for cutting different materials.
- Jigsaw: A jigsaw is a handheld power tool used to make curved cuts in wood and other materials. It’s also great for cutting holes and notches. Jigsaws come in corded and cordless models and can be fitted with different blades for cutting different materials and making different types of cuts. They are especially useful for making intricate shapes and designs.
- Table saw: A table saw is a stationary power tool essential for making precise cuts in wood. It’s ideal for ripping lumber and cutting large pieces of wood into smaller pieces. Table saws come in different sizes and configurations and can be fitted with different blades for cutting different materials. Some models also feature adjustable fences and other accessories for making specialized cuts.
- Miter saw: A miter saw is a stationary power tool perfect for making angled cuts and crosscuts in wood. It’s ideal for making precision cuts for furniture, cabinetry, and other woodworking projects. Miter saws come in different sizes and configurations and can be fitted with different blades for cutting different materials. Some models also feature adjustable fences and other accessories for making specialized cuts.
- Planer: A planer is a stationary power tool used to smooth rough wood surfaces and make them even. It’s ideal for removing imperfections from rough lumber and reducing the thickness of boards. Planers come in different sizes and configurations and can be fitted with different blades for cutting different materials. They are especially useful for preparing wood for finishing and other woodworking operations.
- Router: A router is a handheld or stationary power tool used to shape wood edges and make grooves and decorative designs and used to cut holes and mortises. Routers come in different sizes and configurations and can be fitted with different bits to make different cuts. They are especially useful for custom moldings, decorative edges, and other ornamental details.
- Drill press: A drill press is a stationary power tool used to drill precise holes in wood and other materials. It consists of a rotating drill bit driven by an electric motor. Drill presses come in different sizes and configurations and can be fitted with different bits for making different types of holes. They are especially useful for making accurate and consistent dowels, screws, and other hardware holes.
- Chisels: Chisels are hand tools used for carving and shaping wood and creating intricate designs. They come in various shapes and sizes and can remove material, shape edges, and create details. Chisels are especially useful for making mortises, carving designs, and other precision work.
- Sanders are power tools that smooth out rough surfaces and give wood a polished finish. Several types of sanders include belt sanders, orbital sanders, and random orbital sanders. Sanders come in different sizes and configurations and can be fitted with different grits of sandpaper for different types of sanding. They are especially useful for preparing wood for finishing and other woodworking operations.
- Clamps: Clamps are used to hold wood securely in place and make it easier to glue and finish. They come in a variety of sizes and styles.
Starting with the basics is a good idea for new woodworkers. Basic tools like a handsaw, chisels, drill, hammer, and screwdriver set can help you get started and build your collection over time. Investing in high-quality tools is also important, as they are more accurate, last longer, and are less likely to break or malfunction.
Using tools that are comfortable and ergonomic is also key to preventing fatigue and injury. Look for tools with handles and grips that are designed to reduce strain on your hands and wrists. Cordless tools can also be a great option for greater flexibility in your workspace.
Keeping your tools sharp is essential for accurate and efficient work. Sharpening tools like sharpening stones or jigs can help you maintain the condition of your tools and improve their longevity. By following these tips, you can ensure that you have the right tools for your woodworking projects and that they are in top condition for years to come.
Set up your workbench
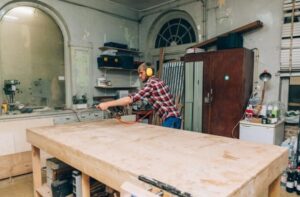 When setting up a woodworking workspace, there are several important factors to consider to ensure that it is safe and efficient. One of the first things to consider is the selection of the workbench. It should be the right size for your workspace and the type of work you’ll be doing, made from sturdy and durable materials like hardwood or steel. Additionally, you may want to consider additional features like built-in storage or a vise to make your work easier.
Once you have your workbench, it’s important to position it in a place where you have plenty of room to move around and access your tools. Positioning it near a window or under good lighting will help improve visibility, which is important for accurate work. You should also consider positioning it near a power source for easy access.
A vise is an essential tool for holding your workpiece securely while you work, allowing you to make accurate cuts. Mounting a vise to your workbench is a great idea, ideally with a quick-release feature for fast adjustments. This will help you keep your workpiece stable and make your work easier.
Adding drawers, shelves, and cabinets to your workbench is a great way to keep your tools organized and within reach. Having a designated place for each tool will save you time and help you work more efficiently.
Installing a power strip on your workbench is useful for powering your tools and charging your devices. Choose a power strip with surge protection and enough outlets for your needs. You can also attach a power strip to the side of your workbench to keep cords off the floor and out of your way.
Protecting your workbench surface is important to prevent scratches and damage, and to make it last longer. Covering it with a durable and easy-to-clean material, such as a rubber mat or a sheet of plywood, is a great way to achieve this. This protective surface will help ensure that your workbench stays in good condition and can be used for years to come.
Install safety equipment
 Woodworking can be a rewarding and fulfilling hobby, but it’s important to prioritize safety in any workshop. There are several important safety considerations to keep in mind when working with tools and machinery. Firstly, it’s essential to wear appropriate clothing that fits well and won’t get caught in machinery. Jewelry and accessories should be avoided as well. Proper technique is also crucial, and it’s important to always follow the manufacturer’s instructions, keep your hands and fingers away from moving parts, and use safety devices when necessary.
A cluttered workspace can also pose a hazard, so it’s important to keep your workspace clean and organized. This includes sweeping up sawdust and other debris, as well as properly storing tools and materials. Additionally, electrical hazards are a real danger in any woodworking workshop, so it’s important to avoid using frayed or damaged cords, not overloading outlets, and use extension cords only when necessary.
Staying focused on the task at hand is also important, as distractions can lead to accidents. Taking breaks when necessary to avoid fatigue is crucial, and seeking proper training can be incredibly helpful in learning proper techniques and safety procedures. It’s always better to seek guidance from an experienced woodworker or take a class when starting out in woodworking, as safety should always be a top priority in any woodworking workshop.
Plan for ventilation
 When setting up a woodworking workshop, it’s important to consider the safety of the space. One critical aspect of safety is ensuring proper ventilation to protect yourself from dust and fumes. Choosing the right fan is a key step in achieving adequate ventilation in your workshop. You’ll want to select a fan that has enough power to move the amount of air you need and can exchange the air in your workspace multiple times per hour.
Once you’ve selected a fan, it’s important to position it strategically in your workshop to move air effectively. This may mean placing it near a window or door, or in a central location within the space. In addition, consider opening windows and doors to provide additional ventilation and draw fresh air into your workspace while pushing out dust and fumes.
To further enhance ventilation in your woodworking workshop, you may want to consider investing in a dust collection system. These systems can effectively remove sawdust and other debris from the air, particularly if you’re working with fine dust or other materials that can be harmful to your lungs. And, even with proper ventilation, it’s still a good idea to use a respirator when working with certain materials or generating a lot of dust or fumes to ensure maximum protection for your health.
Overall, ventilation is a crucial aspect of safety in any woodworking workshop. Taking the time to select the right fan, position it correctly, and consider additional measures like dust collection and respirators can help to protect your health and create a safe and comfortable workspace.
How Much Space do I Need?
The amount of space you need for a woodworking shop can vary depending on the size and type of projects you will be working on, the number and size of tools you have, and the amount of storage space you need.
As a general rule of thumb, you should aim for at least 100-150 square feet of dedicated workspace for a small to a medium-sized woodworking shop. This would allow enough space for a workbench, some storage, and some larger woodworking machines.
For larger woodworking shops, the space requirements can increase significantly. If you have a large table saw or other industrial-sized woodworking machines, you will need more space to accommodate them. Additionally, if you plan to work on larger projects, such as furniture or cabinetry, you will need more space to move around and work comfortably.
It’s important to remember that having more space in your woodworking shop can also help you work more efficiently and safely. Having enough room to move around and store materials and tools can reduce the risk of accidents and injuries, and can also make it easier to focus on your work.
The amount of space you need for your woodworking shop will depend on your specific needs and the size and type of projects you will be working on. A small to medium-sized woodworking shop should have at least 100-150 square feet of dedicated workspace, while larger woodworking shops may require more space to accommodate larger machines and projects.
What are key mechanical considerations for a woodworking shop, specifically related to power, heat, and cooling?
Power is essential in running woodworking equipment safely and efficiently, and it is important to ensure that the shop has enough electrical outlets and circuits that are up to code. You may need the help of a licensed electrician to install any additional electrical service or upgrades.
Woodworking shops generate a lot of heat, dust, and fumes, so it is important to have good heating and cooling systems. A ventilation system can help to cool down the space by bringing in the fresh air and exhausting hot air in the summer, while a heating system will keep the shop warm in winter. An HVAC system can also help remove dust and fumes, improving the air quality in the shop.
Dust collection is also a crucial consideration in a woodworking shop as fine dust particles generated during woodworking can pose a health hazard if inhaled over time. Installing a dust collection system can help mitigate this risk and improve the air quality in the shop. The dust collection system can be integrated with various power tools, capturing the fine dust particles before they become airborne.
Good lighting is necessary for a woodworking shop to ensure that you can see your work clearly and avoid mistakes. You may need to install additional lighting fixtures, especially if the shop has no windows or poor natural lighting.
Overall, taking care of mechanical considerations when setting up a woodworking shop can create a comfortable, efficient, and safe working environment that will allow you to create high-quality woodwork pieces.
What Type of floor?
The type of flooring you choose for your woodworking shop is an important decision that can impact the safety, durability, and functionality of your workspace. There are several flooring options available, each with its own advantages and disadvantages.
Concrete is a popular choice for its durability and ease of maintenance, while vinyl is affordable and can be designed to resemble other materials. Rubber is a good choice for reducing fatigue and noise, and epoxy is resistant to stains and impact. When choosing a flooring type, consider the specific needs of your woodworking projects and the type of machinery and tools you will be using.
By choosing flooring that is durable, easy to clean, and provides a safe and stable working surface, you can create a woodworking shop that is both functional and comfortable to work in.
Can I share a garage shop with cars?
Sharing a garage shop with cars is possible, but not ideal for several reasons. Safety concerns are a significant issue when it comes to sharing space with cars, particularly when working with heavy machinery that produces sawdust, chips, and other debris. Storing woodworking tools safely and securely is a must to avoid accidents that could harm people or damage vehicles. Space limitations are another issue, especially in small garages, where finding adequate storage for tools and materials can be challenging.
Dust and debris generated during woodworking can also settle on cars, causing damage to the paint and interior. Additionally, sharing a garage with cars can create temperature and humidity issues, as vehicles produce heat and moisture that can affect the wood and tools. While it’s possible to share a garage shop with cars, it’s essential to take precautions to minimize these potential issues.
The End
Setting up a woodworking workshop can be a fulfilling and enjoyable experience for both beginners and experienced woodworkers. By following the tips and guidelines outlined in this article, you can create a safe, organized, and efficient workspace that will allow you to pursue your passion for woodworking to the fullest.
Remember to plan ahead, invest in quality tools and equipment, prioritize safety and comfort, and be mindful of the materials and supplies you’ll need. With dedication, practice, and a little creativity, you can transform your woodworking dreams into a reality and create beautiful, functional, and long-lasting pieces that you can be proud of. Happy woodworking!
Table of Contents


![Best Woodworking Books for DIY, Carpentry & Woodworker In 2024 [Updated Version]](https://woodworkingarena.com/wp-content/uploads/2019/07/Great-Woodworking-Books-768x476.jpg)

